TIMM'S BMW E38 REAR LIGHT CLUSTER
REMOVAL AND REPLACEMENT
In theory getting the rear light clusters
off should be another 'easy peasy' job. And....it is unless you have Sat nav,
Phone, DSP etc as these seriously get in the way. But, we have all the answers
as usual.....
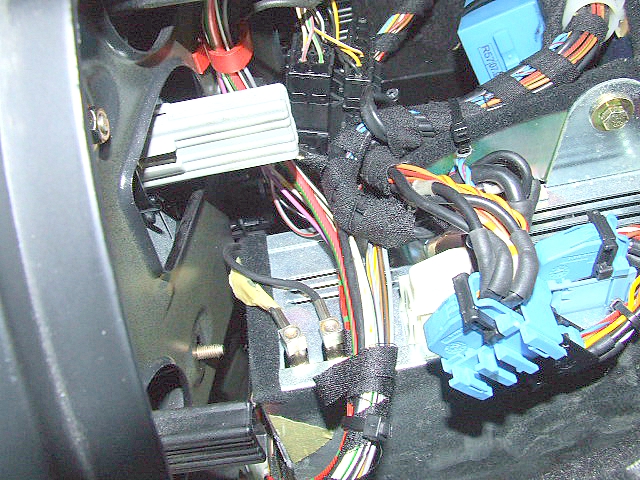
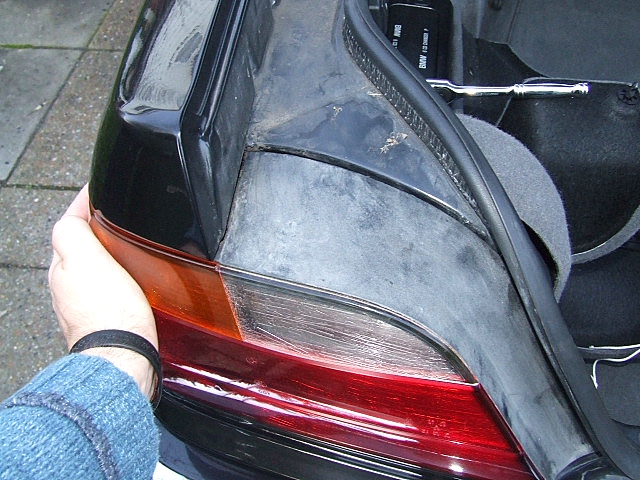
Getting the RHS cluster off is straight forward, just remove 4 x 8mm nuts which
can be found under the battery cover and it's all over. The LHS, however looks
like this:
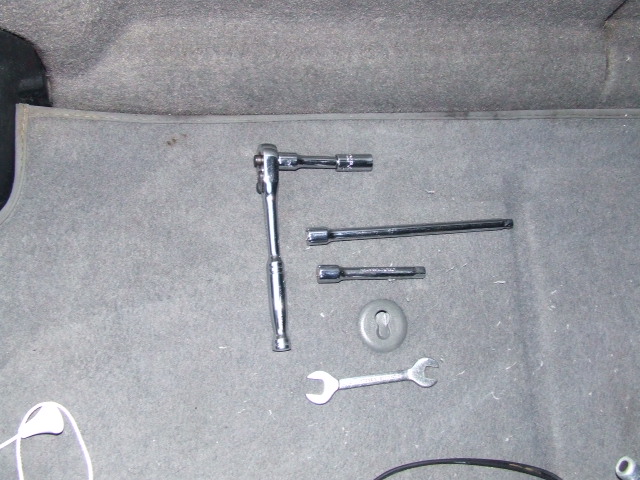
Firstly you will need a small 8mm ratchet, various extensions and an open-ended
8mm spanner:
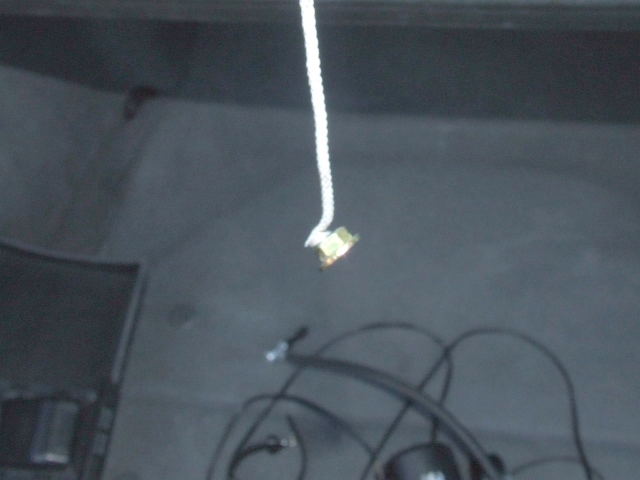
I had a good look around the light cluster aperture and did not fancy dropping a
nut, or even worse, a spanner. So, it is time to get the super-glue and a small
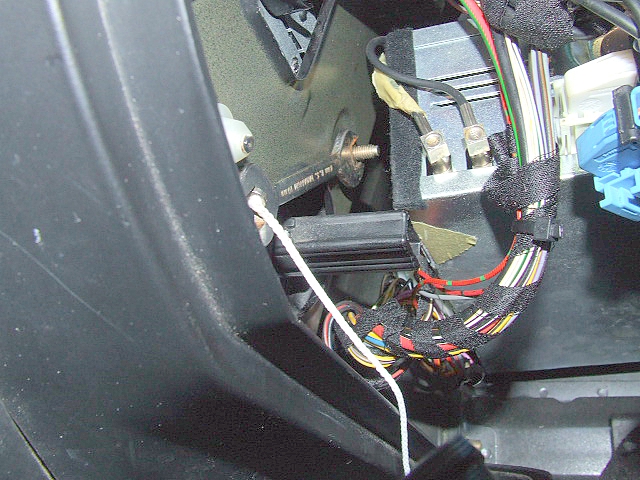
magnet out. I glued a length of string to a small Neo magnet and tested it one
of the nuts from the LHS cluster:
I previously tried tying string to an Allen bolt to which I partially screwed on
one of the nuts.......the bolt got in the way, I also tried a bigger
magnet.....the magnet got in the way, so, the small magnet was the only winner.
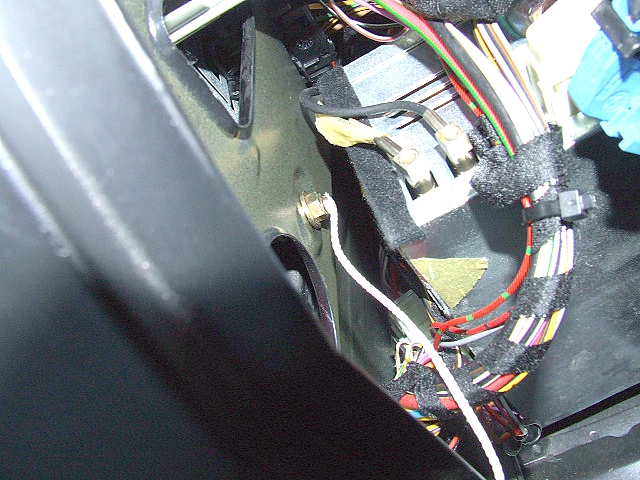
The two upper nuts can be found quite easily, and can be removed with an 8mm
ratchet using the correct-length extensions. That's the easy bit......
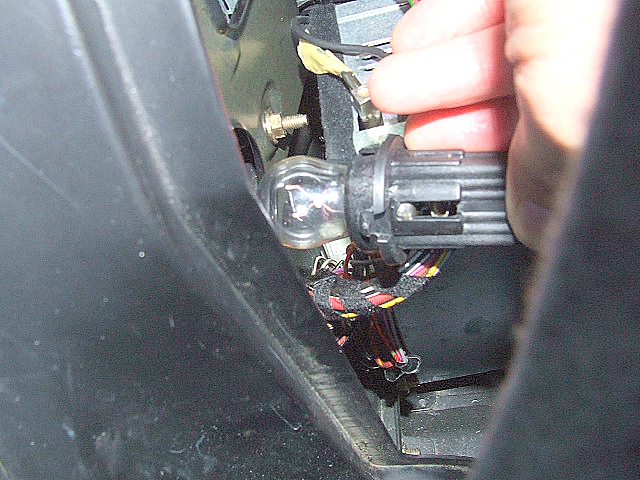
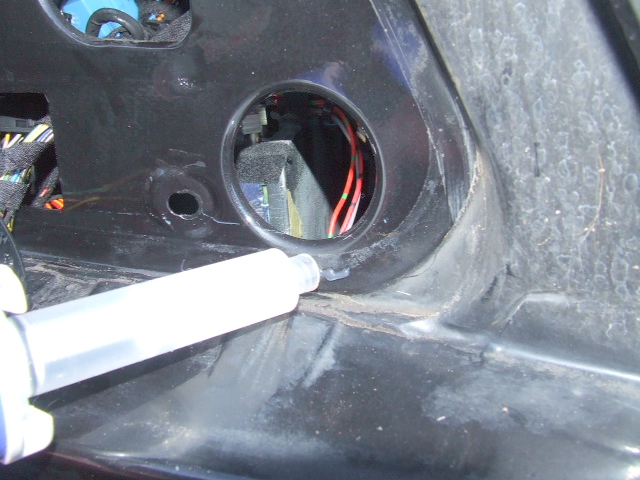
The next nut to be removed can be seen here, remove the fog light first to gain
more access. One of the control modules is right ahead of it so you won't
(safely) get a ratchet in there:
Just for safety's sake I stuck the magnet and string on the spanner. Just loosen
it enough to remove it by hand........I seem to have stuck the fog light back in
for this picture....it should be out at this stage!
Just be very careful as the nut comes off....don't lose it, to be safe, stick
the 'magnet-on-a-string' to the nut as it becomes loose.
The final nut cannot be seen but can be felt if you stick your hand down against
the outer-skin of the wing. The open-ended spanner is your only chance here,
again, use the string to reduce the possibility of losing the spanner and stick
the magnet to the nut as it becomes loose.
Once all the nuts are off pull the cluster out by a couple of inches so that you
can get to the loom, disconnect the loom and leave it dangling from the
aperture.
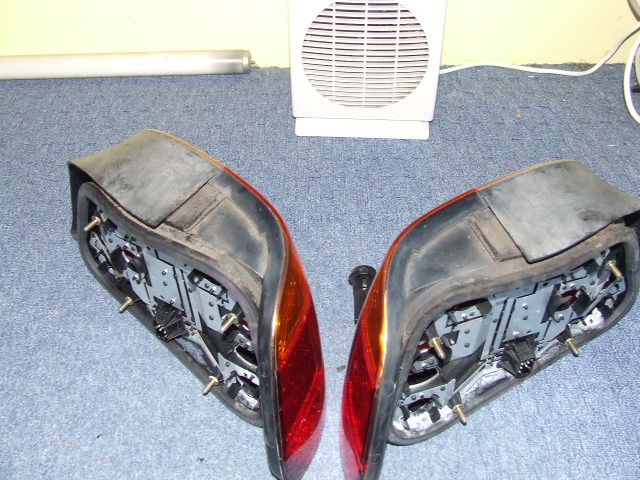
That's about it for removing them, if you are replacing the clusters with
crystal types then get on with it below. I took mine off due to the 'tropical
fish-tank' effect and the fact that I kept getting a 'check brake lights'
message.
The reason they fill up with water is due to a blockage in the drainage channel
that runs around the outside of the gasket. I removed all the lamps and holders
and stuck them in the kitchen sink. Gave them a good scrubbing to remove the
oxidisation on the contacts and then dried them out. They need to be dried from
both sides due to the multilayer design:
Right, start replacement by greasing the gasket inside and out and also cleaning
and then greasing where they land on the rear of the car:
Use the 'magnet-on-a-string' on each of the nuts and then just do each one up
hand tight:
The holes in the bodywork are quite large and allow some movement of the
cluster. To get it in the right place get the ratchet in place and press in
towards the centre of the car so that it is secured correctly:
While squashing the light in the direction shown get your mits around the back
and get the nuts as tight as possible by hand. Tightening them fully using the
open-ended spanner and ratchet is fiddly but quite straight-forward.
All done, time for a cup of tea

![]()
