TIMM'S BMW E38
REAR DOOR ACTUATOR REPLACEMENT AND REPAIR
My E38 rear door would not lock, even by
pressing the button down. There was no sound from the actuator so I guessed that
this part had failed. After searching these and other Forum's there was little
information available apart from one comment that said it was 'extremely
difficult'. Well, he wasn't kidding....but....once you know where the actuator
is and how it is held on you will have a much better chance of getting it out
and replacing it.
This routine also shows you how (if you really fancy it) you can repair the
actuator as well.
Right....lets get going. you will need a nice day to do this as the door will be
open most of the time. You also need quite small hands, there is no way you are
going to get fat hands into the door cavity!
To start with, remove the puddle-light cover and then prise out the puddle-light
housing. Disconnect the loom that goes to the puddle light.....it's a darn sight
easier doing this now than when the door is dangling.
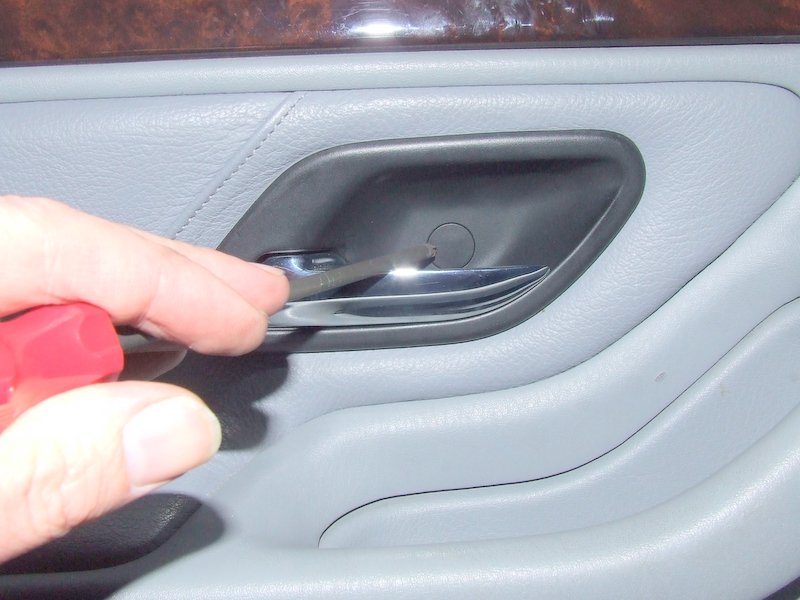
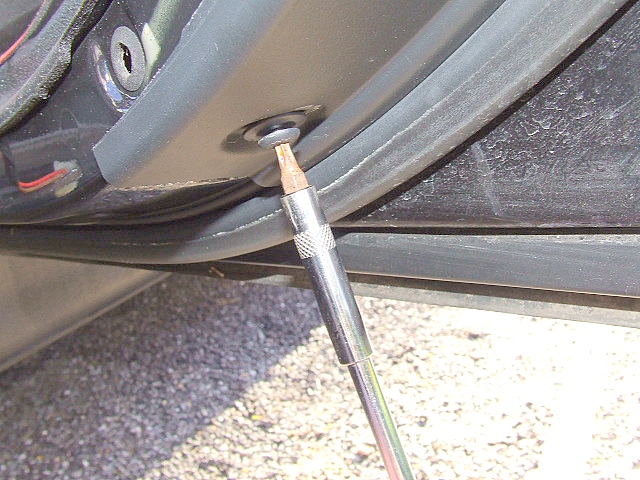
Start by removing the screw cover behind the door handle by prising from below,
remove the Pozi screw that is underneath it:
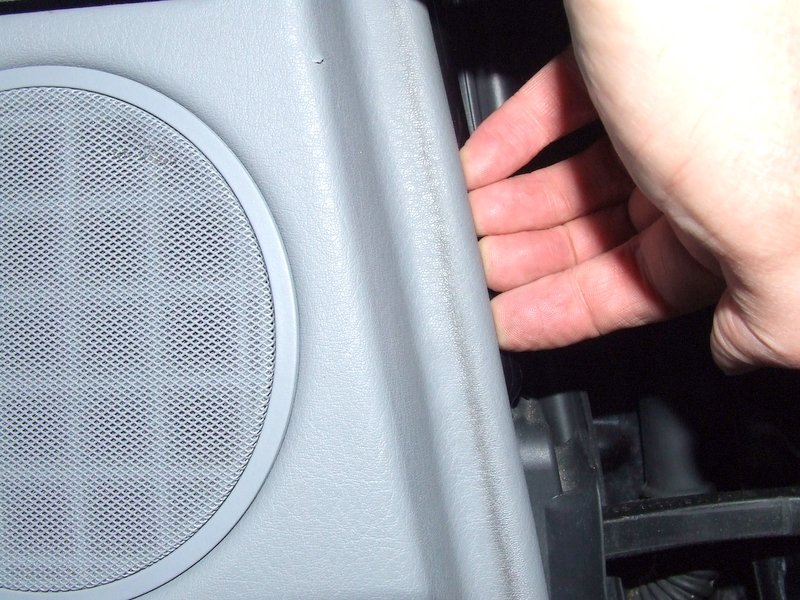
That was the only screw that holds the panel on....the rest is the push-lock
type fasteners. Don't use any tools as you may scratch the door. Grab the door
panel right next to the hinge, get your fingers between the panel and the door
and feel for the first fastener. Once you have your fingers around it give a
sharp pull and the panel will unclip.
Work clockwise (for nearside door) or anti-clockwise (for offside door), feeling
for the fasteners and giving a sharp pull once you have found them. Once all the
fasteners are popped out lift the panel slightly and it will disengage from the
window sill. The wood trim comes off with the panel:
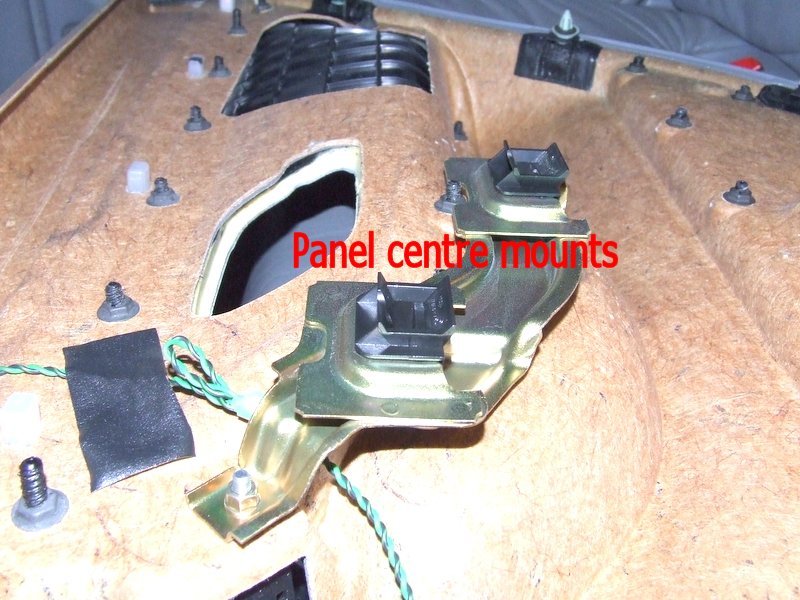
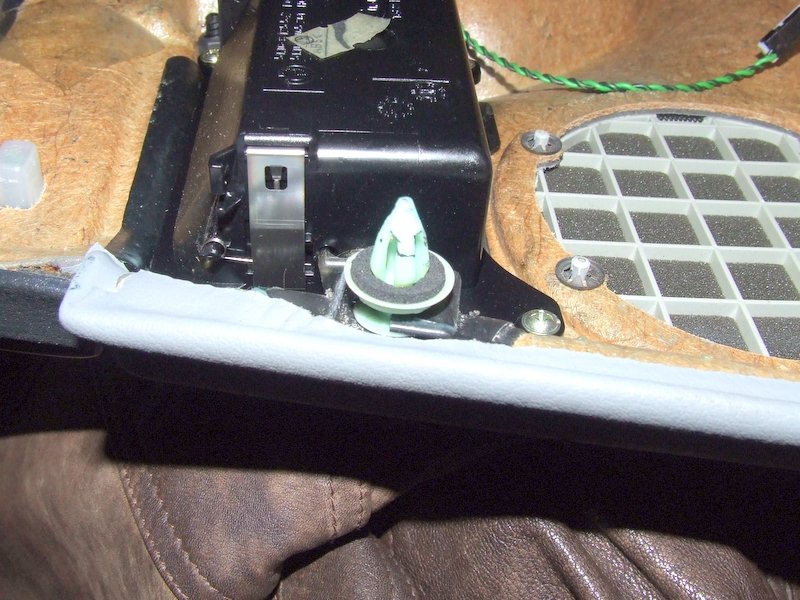
After doing this repair a few months later the other rear actuator failed. This
time the door panel refused to come off due to some damage to the locking tab
that fits inside the central two snap-locks. These are much beefier than the
outer fixings and can be seen in the picture below. This is how they are meant
to come off:
I swore at this problem for quite some time.....no matter how hard I pulled the
central fixing would not come out. However, if you have this problem the
solution is simple:
Remove the panel from the top of the door where it meets the chrome trim up
against the window glass. Make sure all the outer fixings have been disconnected
and that the inner door handle is twisted through the panel.
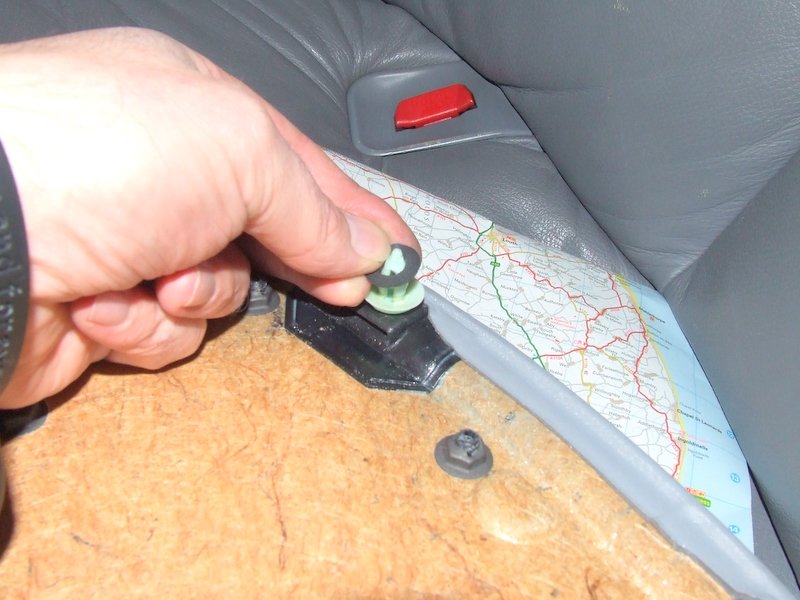
Now give the whole panel a good lift at the same time as pulling out. What will
happen is that the plastic parts of the catch will stay on the door and the
metal frame will stay on the panel....whoopee it's out at last!
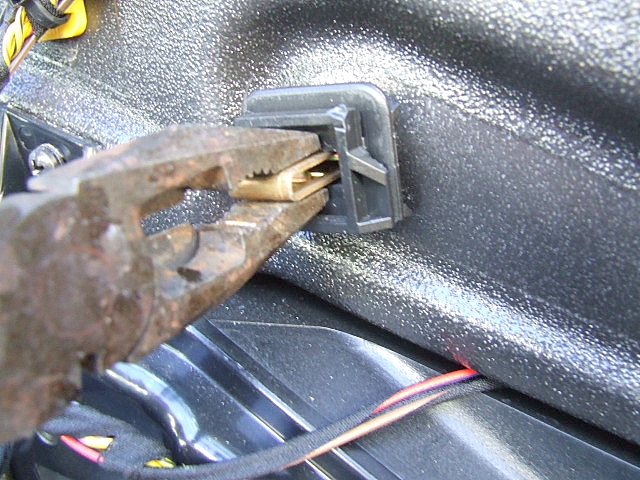
Now use a pair of pliers to compress the tangs so that you can remove the
plastic bits from the door:
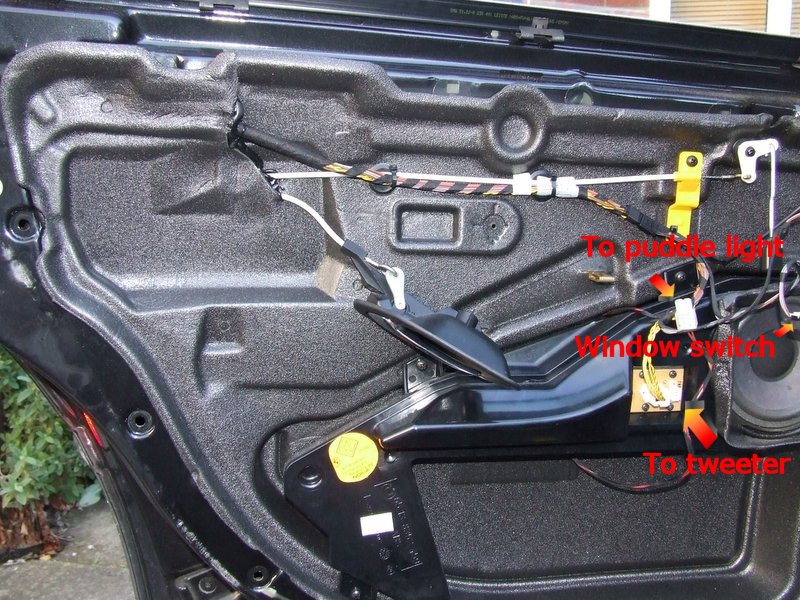
The panel will now be connected to the door by four connectors.....Ashtray
illumination, window lift buttons, puddle light and (if you have the luxury DSP
system like me ) the tweeter connection. As you have already disconnected the
puddle-light loom you only have to feed this through the inner panel. The door
handle can be swivelled through the panel. Put the panel down on a soft surface
with the inner surface facing upwards:
If, like me, you have a couple of the snap-lock fasteners left behind, carefully
prise these from the door. Now is the time to superglue them back to the panel:
At the same time remove the felt washers that have got stuck to the door and put
these back on the fasteners:
To get access to the actuator area the soundproofing needs to be pulled back.
Use a really sharp knife to cut through the rubber compound that is used to fix
this to the door panel. If you use a sharp knife the rubber compound will
re-seal again when the soundproofing is put back on. If you just pull, it will
tear:
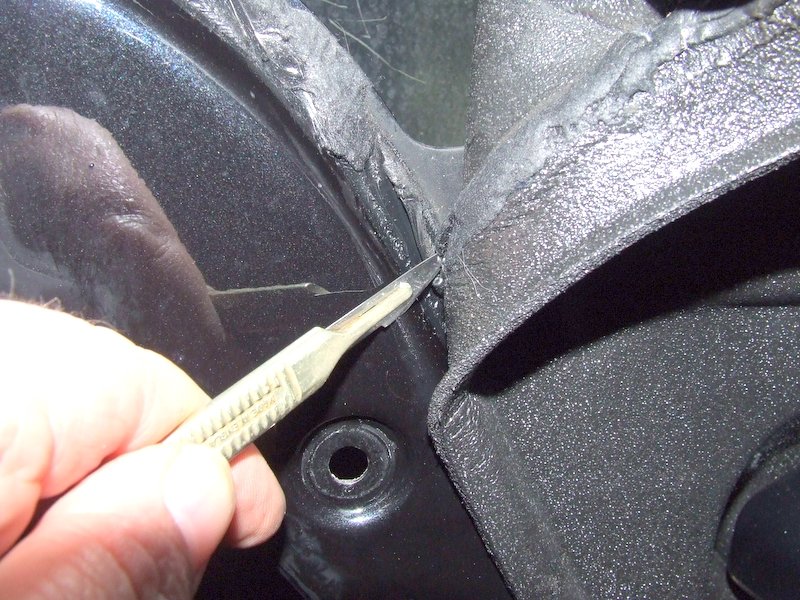
You only need to cut back as far as this, once this is done tape the
soundproofing back or it will stick itself back on again!
Ignore the Actuator connector....you're not getting to it that easily!
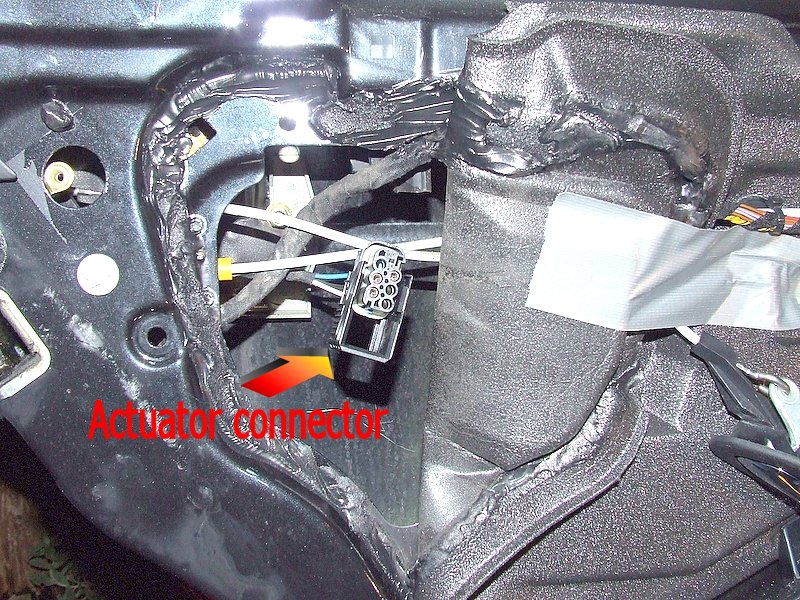
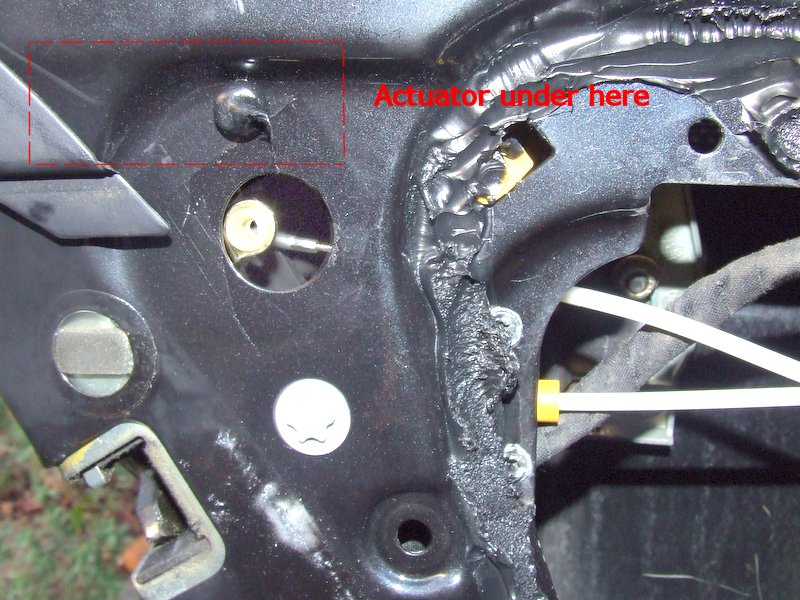
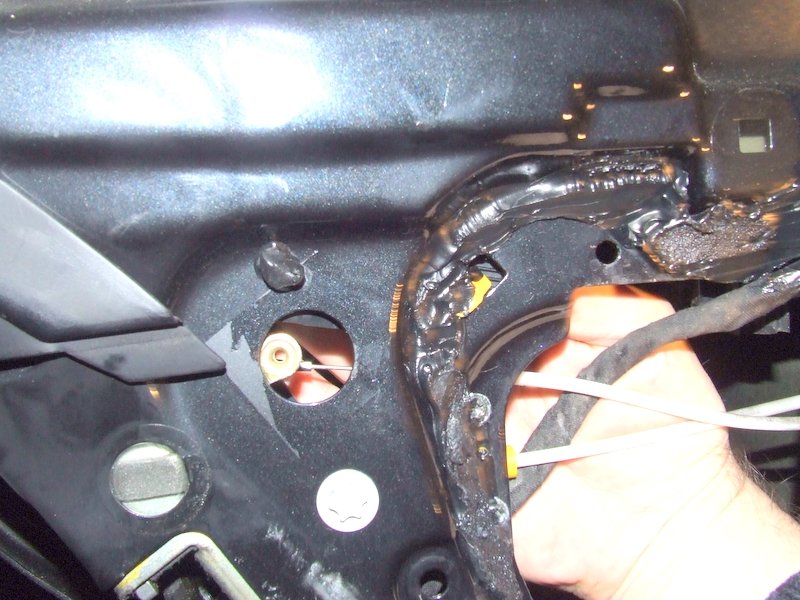
Right, that's been easy so far! This where the actuator lives....right at the
top rear part of the door up by the quarter light:
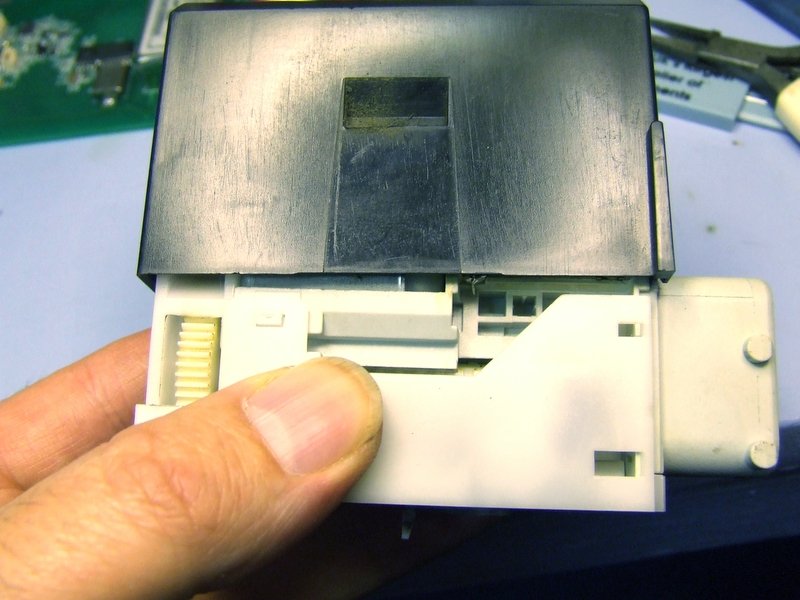
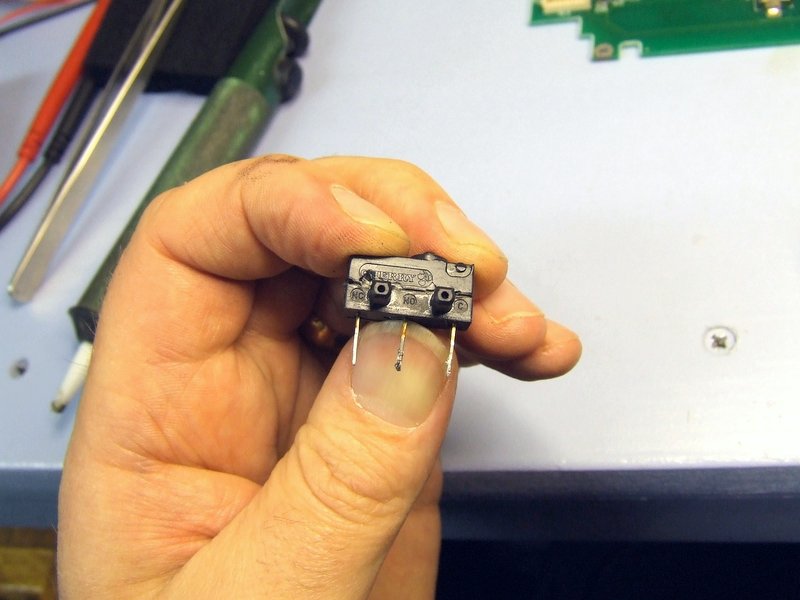
Probably the best thing to do is to show what the actuator looks like and how it
is attached. Here are pictures of the actuator dangling from the loom:
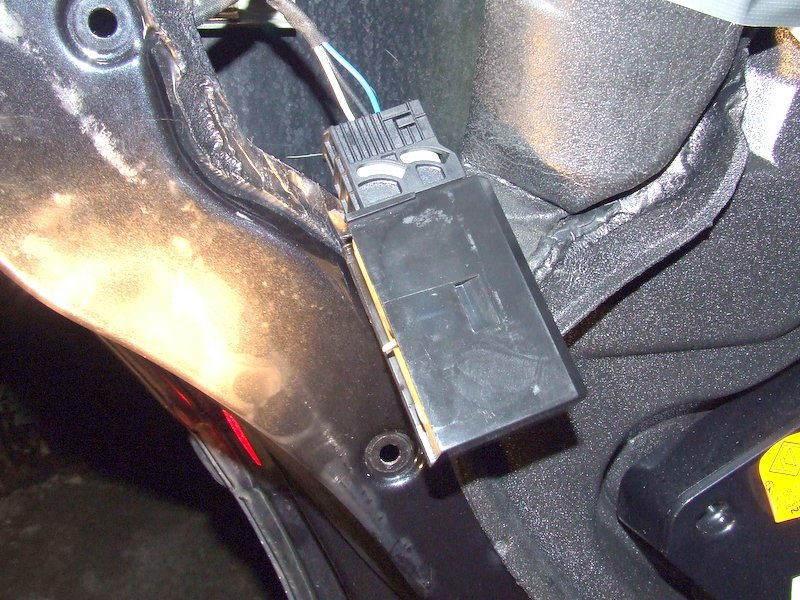
There is a slot in the underside of the actuator:

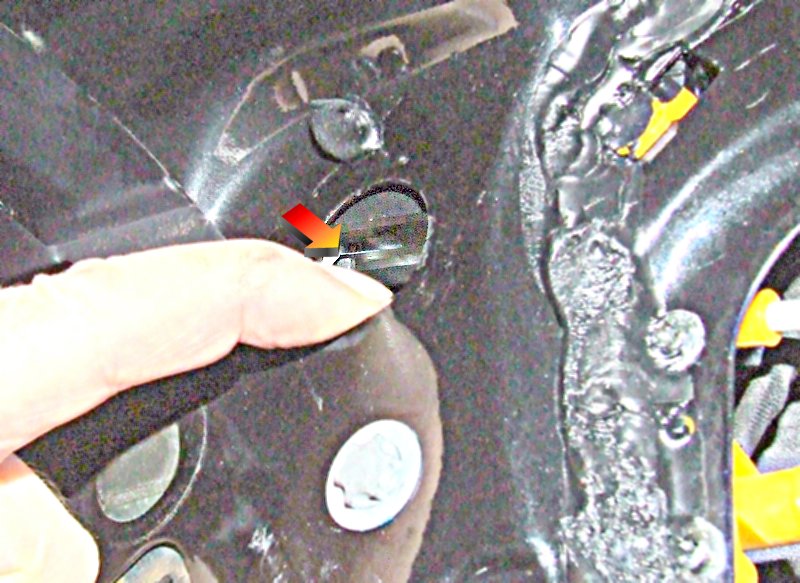
...and a tang which goes in the slot which can just be seen here. It faces
upwards towards the top of the door. Behind it is a plastic catch which clips
onto the side of the actuator:
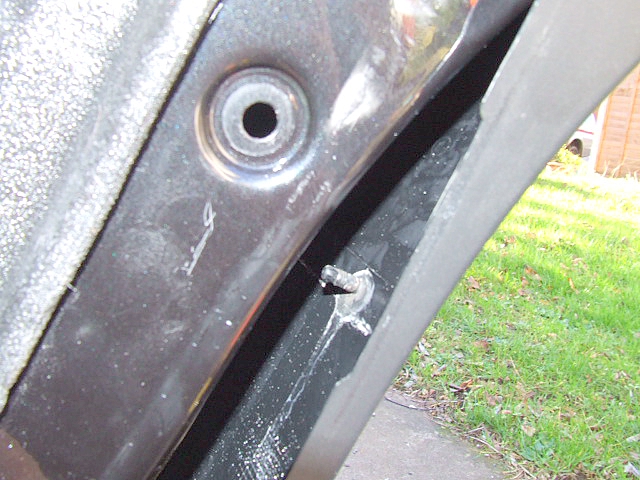
Right....now is the fiddly bit. You need to get your hand inside the panel and
grab onto the top of the actuator. At the same time poke a finger through the
hole to the left (push down the lever to get more access) and poke the actuator
connector upwards. With a heave and a ho (...and repeat) you can slowly wiggle
the actuator upwards....it will go click and be free from the door (hooray)...
Note: See later section, there is an easier way to do this, especially on the RH
door
Rather than wimp out and just replace the actuator I decided to see if I could
repair it. The mechanism is very clever. It uses a motor to drive a worm gear
that compresses a spring, when the spring is fully compressed it releases it and
the energy is used to pull the door catch which goes with a good twang just like
a cap-gun mechanism. There is also a microswitch which determines that the motor
is at the extent of its travel in either direction:
The cover can be prised off:
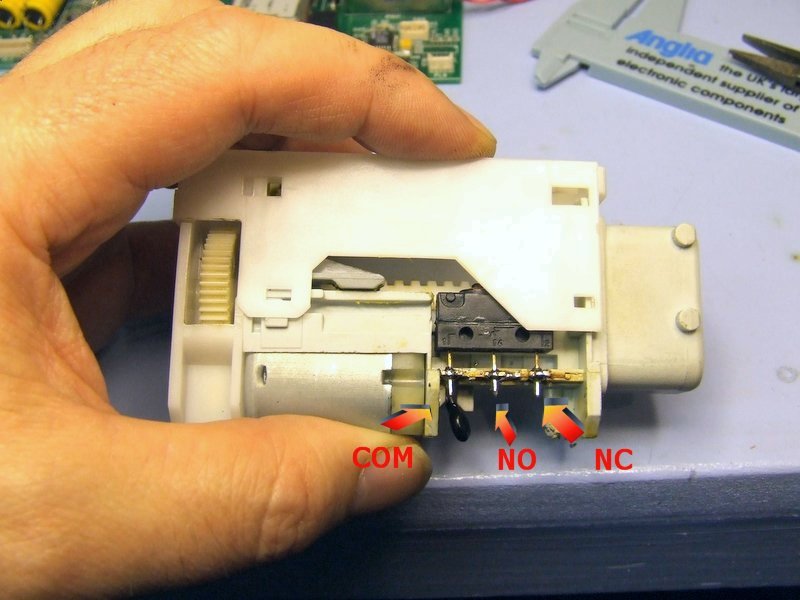
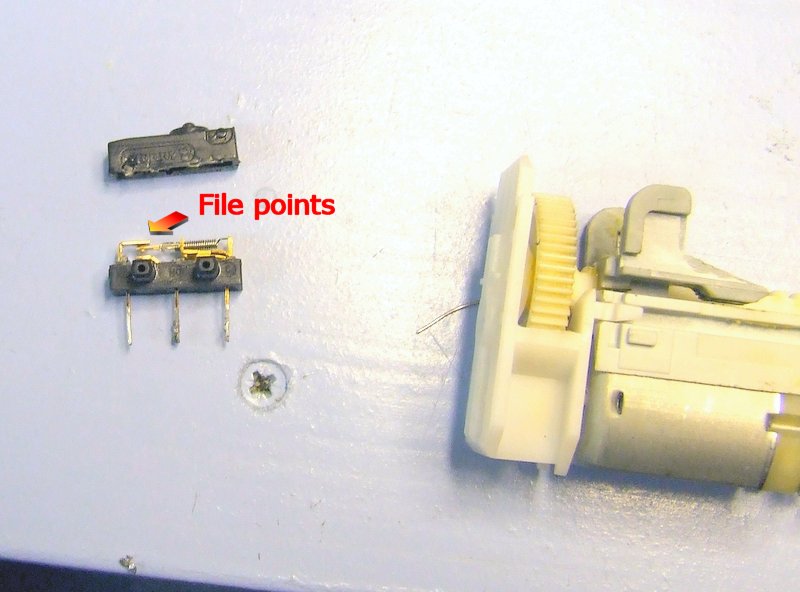
Here's the microswitch and the contact designations:
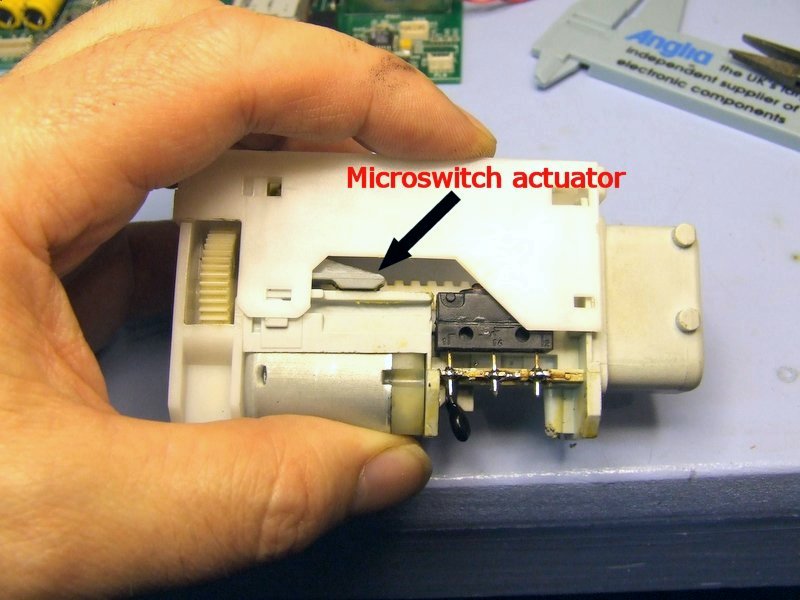
And here's the actuator for the microswitch:
My microswitch was a dud, the outer connections should have been connected when
the microswitch button was not pressed. They were open circuit so I oiked the
switch out and scrunched it in half. I filed the upper contacts and it started
working again:
And then used Superglue (at the ends only) to stick it back together:
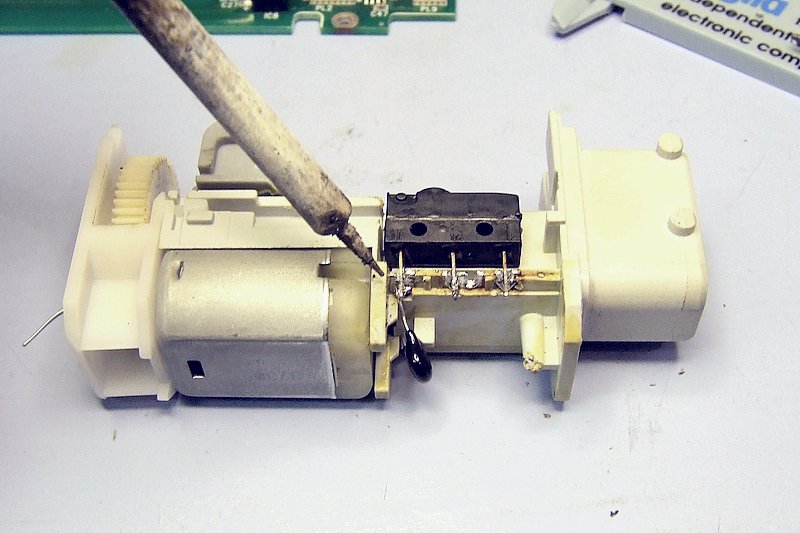
And soldered it in place. The tabs that the microswitch is joined to slurp heat
from the iron so you will need a pretty hefty one:
I dangled the actuator on the loom and made sure it worked before tackling the
bendy-hand replacement method.
The trick here is to get the little lever out of the way by pushing it downwards
so you can see through the hole......watch the actuator through the hole as you
put it back in position, and make sure the tang fits into the slot at the bottom
of the actuator. It is very difficult to get any downwards pressure on the
actuator but keep at it and it will eventually clip back in position. Keep
watching through the hole to ensure that the actuator is fully down on the tang.
The above technique worked OK on the LH rear door but the RH rear door is a bit
harder for a right-handed person (like me) as you can only get your left hand in
the door aperture. After trying to get the actuator back on for half an hour I
decided on another plan which worked quite well.
Remove the lower trim panel from the edge of the door. This is fastened by a
plastic Torx screw fitted to an expanding collet, remove the screw and the
collet.......
......and smaller plastic rivets fitted to the trim in two places where it meets
the side of the door:
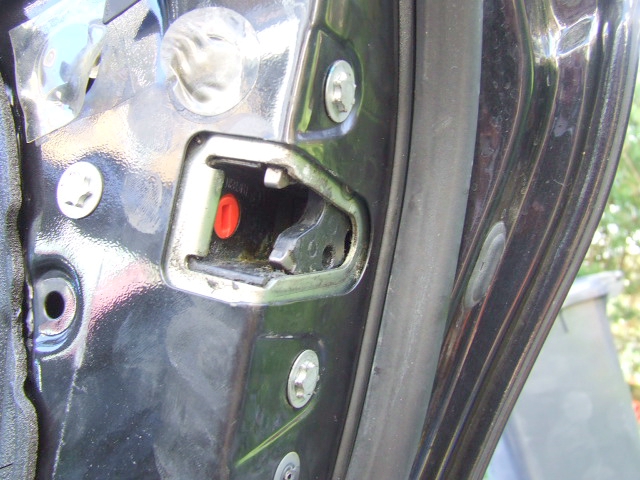
This gives access to the three male Torx bolts that can be seen here. Remove all
three and the lock mechanism can be pushed a couple of inches down the door
giving better access to the actuator mating area:
The actuator is much easier to get back on this way and goes on with a
satisfying click. Push the lock mechanism back up the door and refit the three
Torx bolts.
Operate the central-locking a few times to ensure that it operates correctly.
By now the glue should be set on the door panel and the fasteners should all be
lovely with the felt washers in place. Note that there are two sockets in the
door panel that secure the centre of the panel in place:
Remove the tape from the sound-proofing and stick this back in place, it should
stick nicely if you used a sharp knife to cut the rubbery compound.
Start replacing the door panel by reconnecting all the looms, dangle the
puddle-light loom through both skins and reconnect the puddle-light housing.
Push the housing back into the door panel and refit the cover.
Lift the panel over the window sill, get the lock-button into the recess, push
down the panel so that the top clips into place. Wiggle the door handle through
the door panel and leave facing the correct direction.
It is now just a case of lining up each fastener and giving a hearty shove to
pop it back in place. You may find it easier to push the centre fasteners in
place first, I did.
....and that's about it, just fit the screw behind the door handle:
If I was to do it again I would have had a new actuator ready, or, at least, I
would have replaced the microswitch (which I had already ordered from RS part
number 290-0463). Still, it's fully working now!
EDIT: For the RH door actuator I used the RS microswitch, it fits OK but does
not have the mounting lugs as the original has. Just note the position of the
original before removal and ensure the switch clicks as the slide is moved
backwards and forwards. I also gave the RH actuator a good helping of grease to
make it operate more smoothly......
Time for a cup of tea