Timm's BMW M60/M62 V8 Engine Inlet Manifold Leak Simple Fix
Update 2018 - NEW INFORMATION ON ADAPTATIONS AND RUNNING PROBLEMS
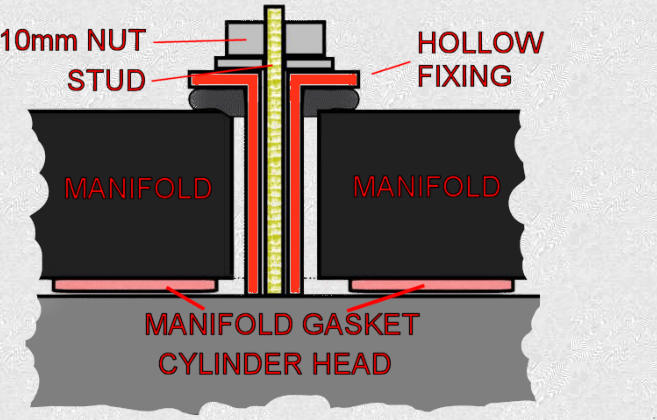
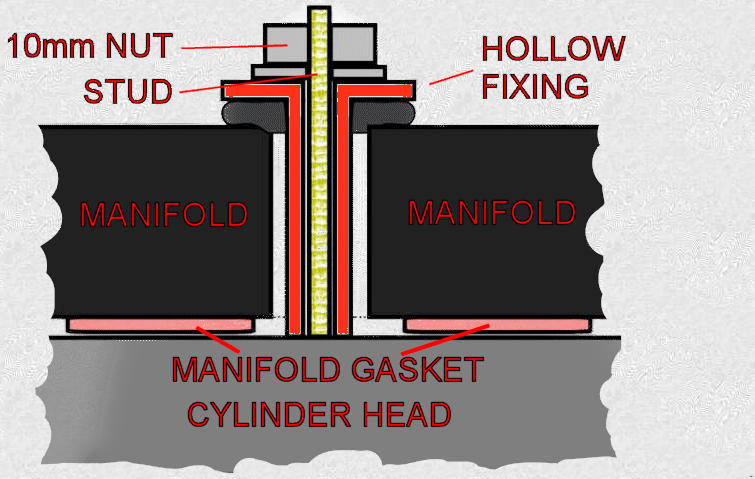
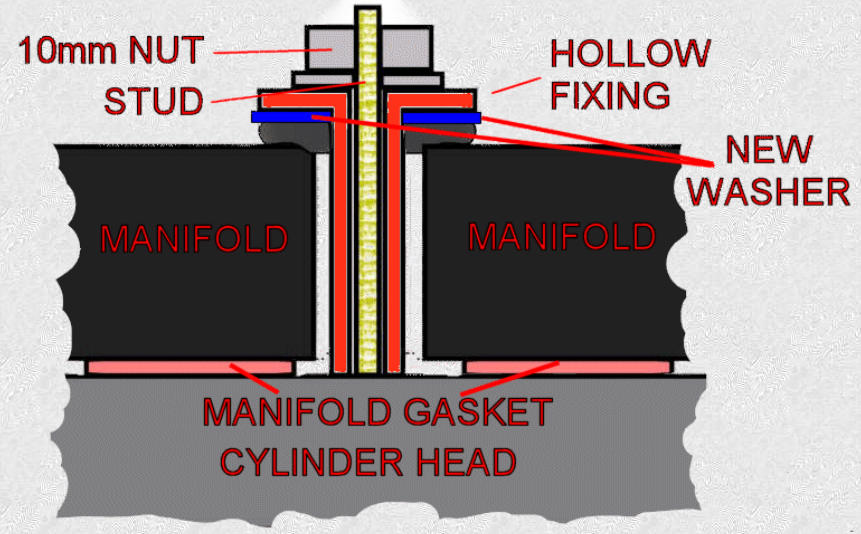
Shown above is the inlet manifold in black sitting on the head (light grey) with the manifold gasket showed in pink. There is a gap shown because the
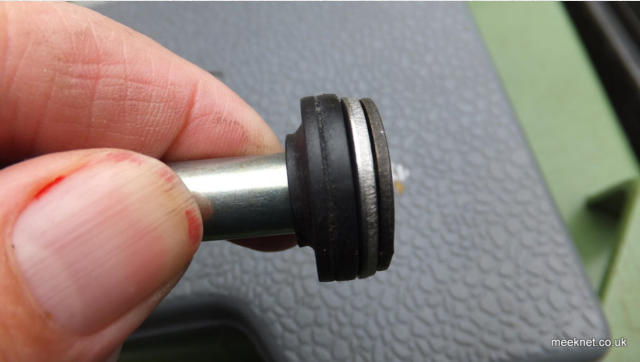
rubber compression piece (shown in dark grey) has lost its elasticity. Tightening the nut makes no difference as the hollow guide (shown in red) is
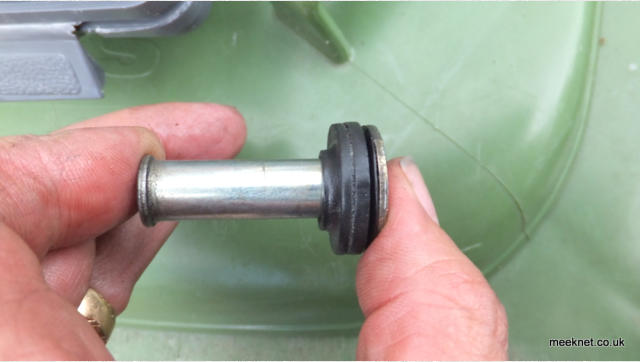
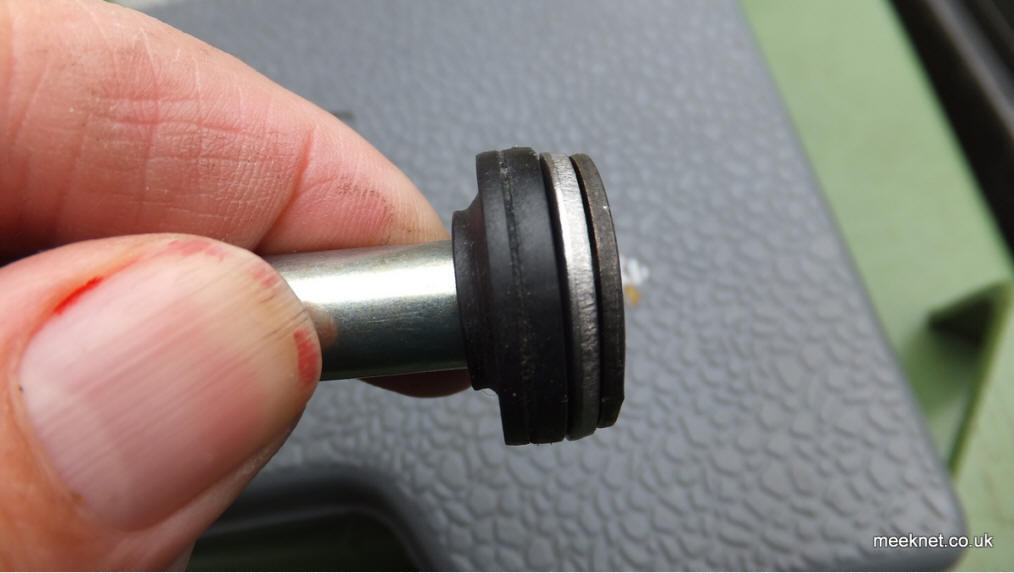
already sitting on the head. Here's one of the guides with the rubber compression piece fitted (and a squashed grommet from an early attempt):

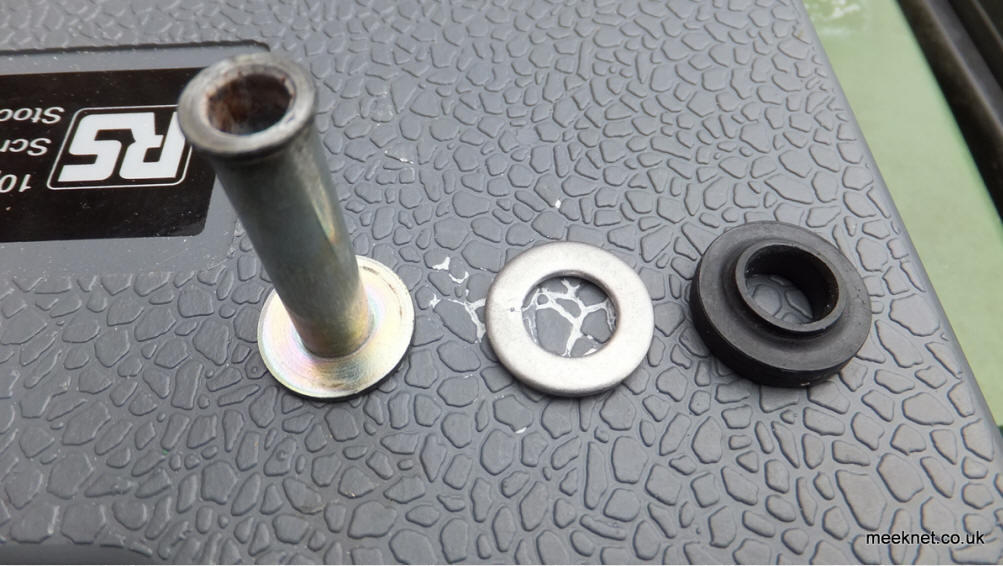
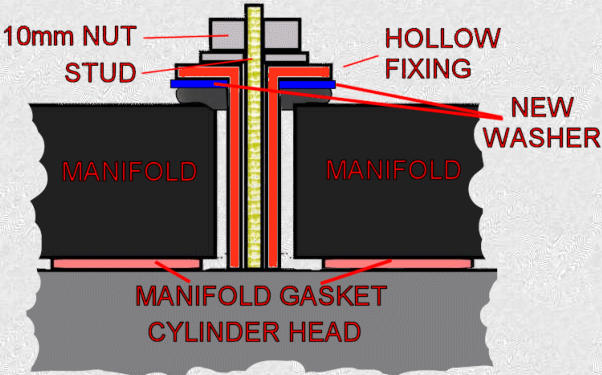
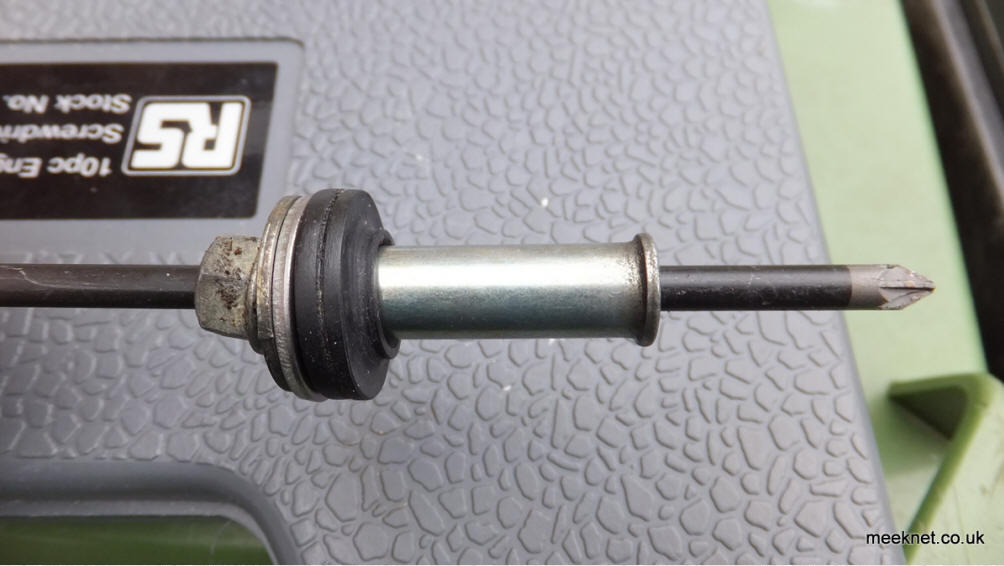
Below is the assembled fixings I'm finally using, hollow shaft, 12mm washer and the rubbery bit:
These washers are 2mm thick and should compensate nicely for the compressed rubber bits including the manifold gasket:

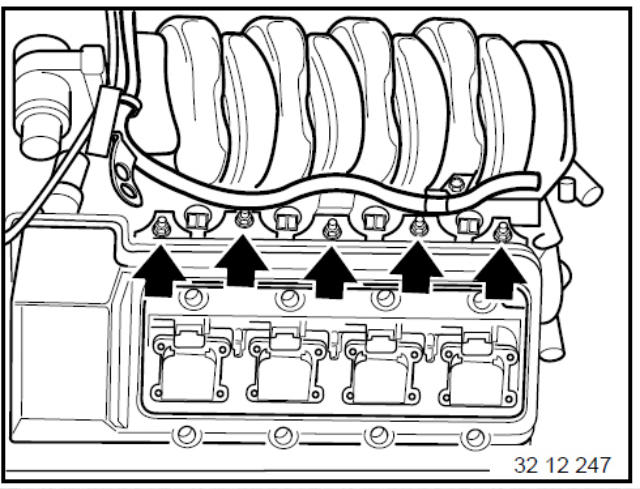
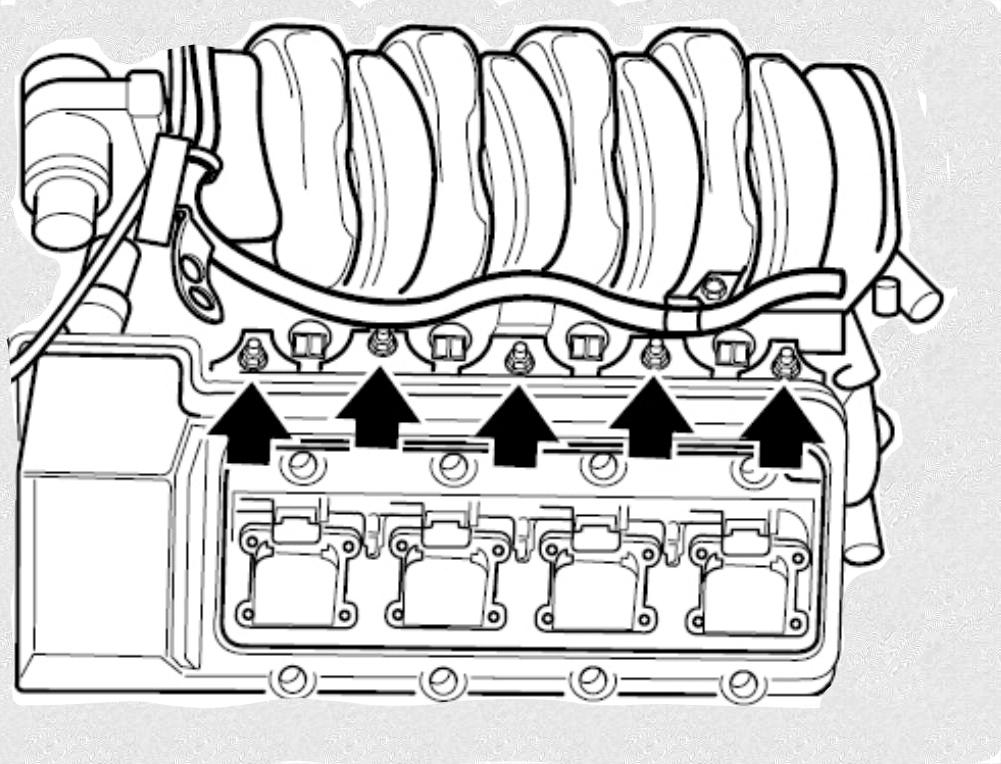
Right, let's get on with the manifold. Here's the manifold fixings we are after, five per side:
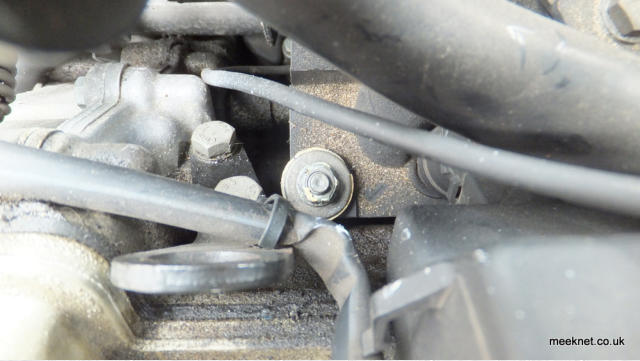
this one is at the front of Bank 2:

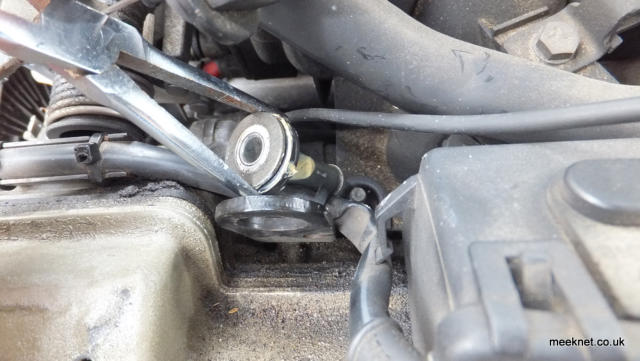
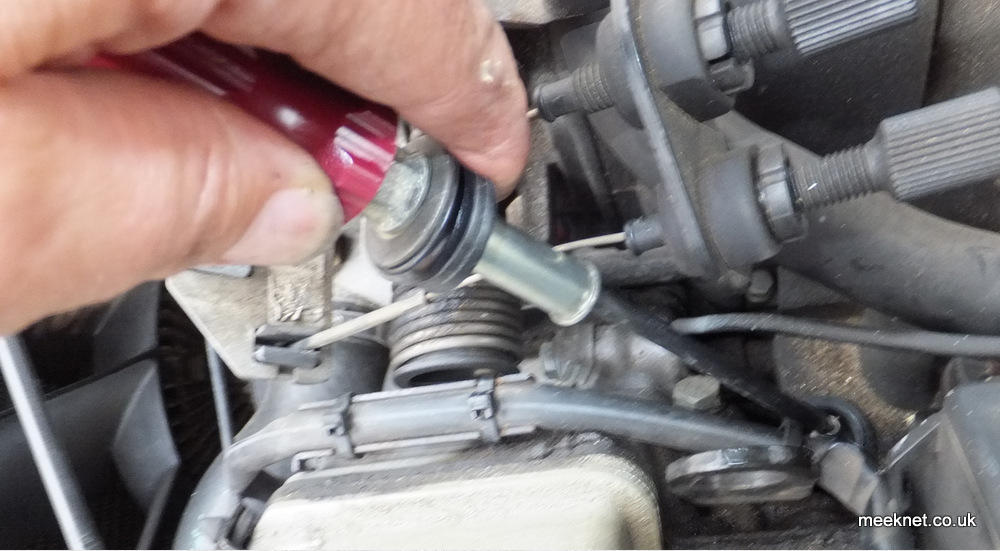
Now use a pair of long-nosed pliers to remove the hollow fixing:
Work on a single fixing at a time so that the manifold cannot move and allow debris under the gasket. Pull the rubber part from the hollow fixing, fit
the washer, fit the rubber part back on and assemble the lot including the nut on the shaft of a long screwdriver:
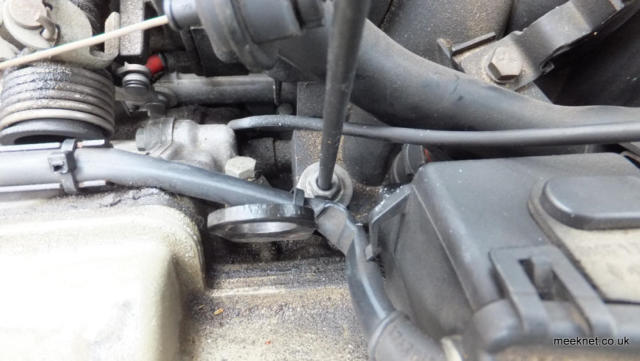
and drop the parts onto the stud so that the hollow fixing drops into the manifold leaving the nut ready to tighten into place:


As you tighten the nut you will find there are a couple of turns at the end where the rubber is being compressed - this pressure is now pushing
the manifold down on the manifold gasket so that it seals correctly. Repeat for the rest of the manifold fixings - the tricky ones on the E31 and
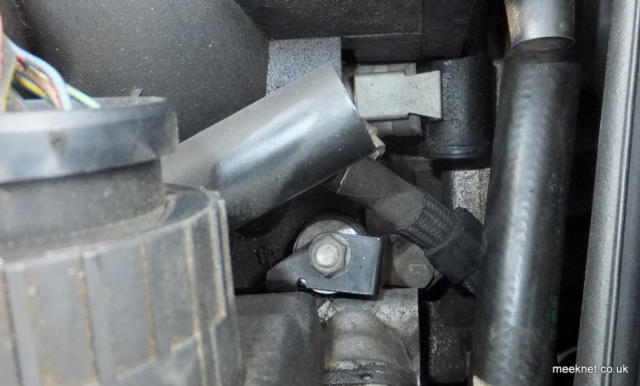
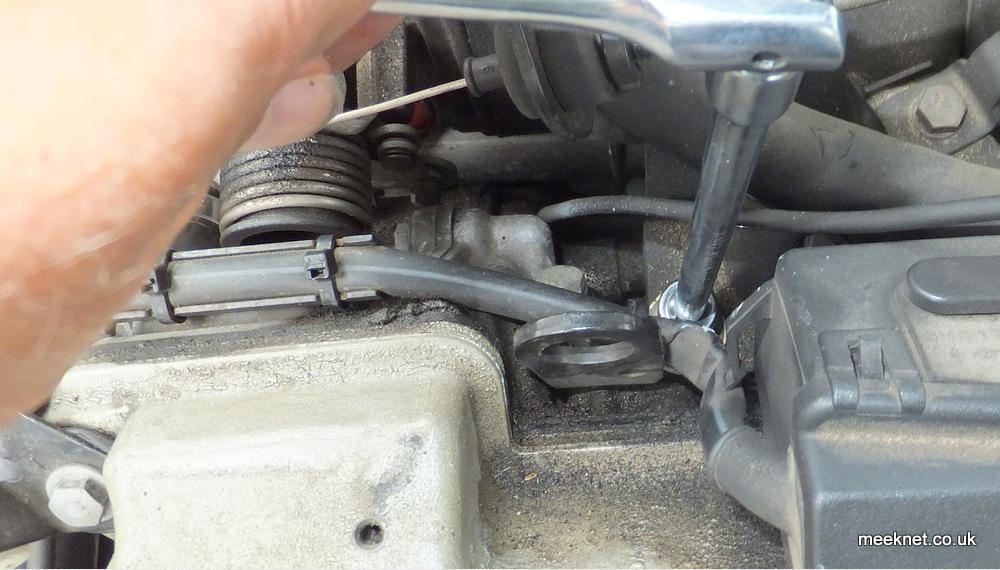
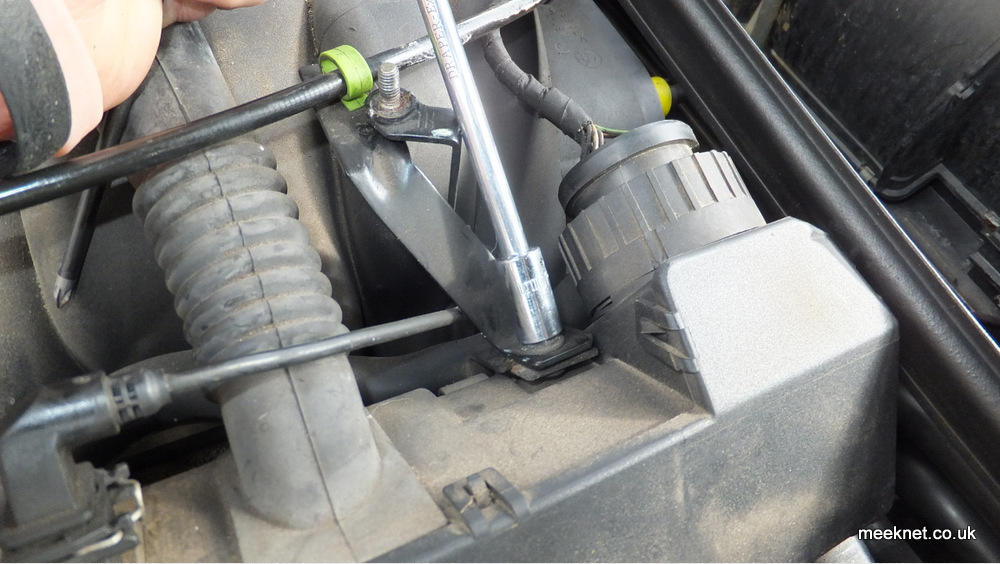
E32 is the one between cylinders 7 and 8. To reach this one, unbolt the bracket that holds the Bowden cable temporarily:
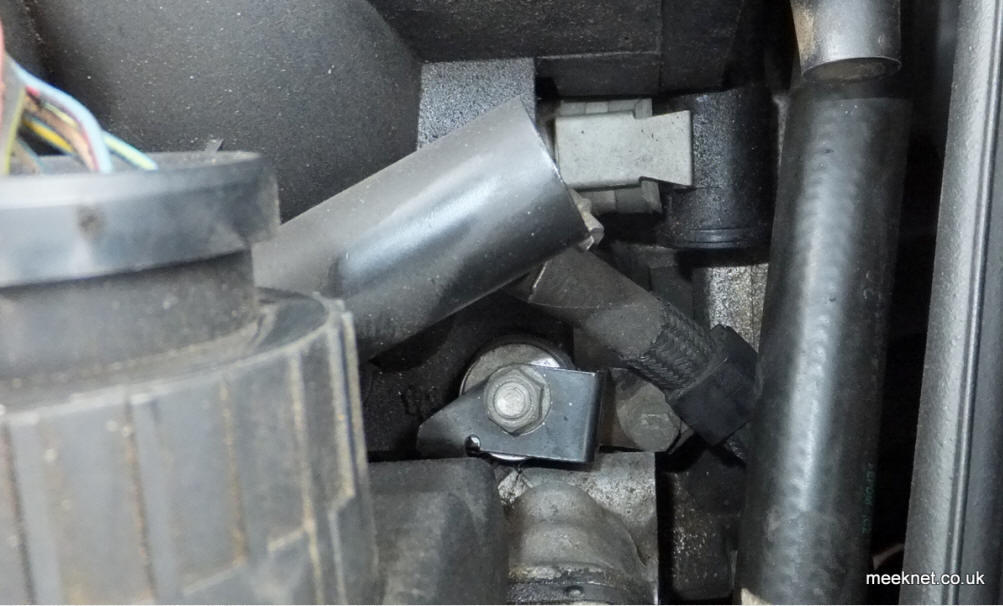
The two rear fixings (which I didn't notice the first couple of times) were a bit awkward. The one on Bank 2 has a little clamp that holds the fuel hose
away from the hot bits - remove the nut and then move the bracket aside:
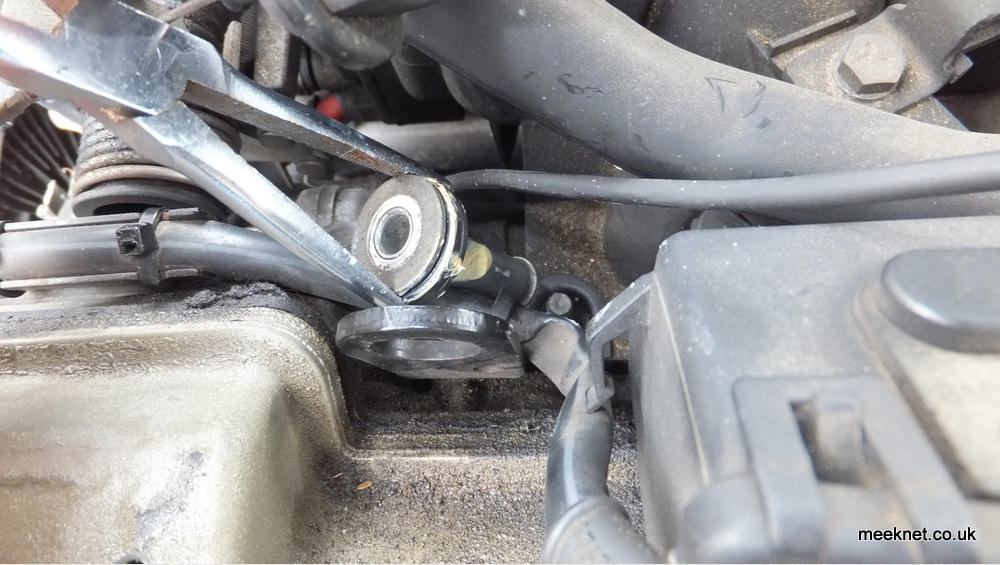
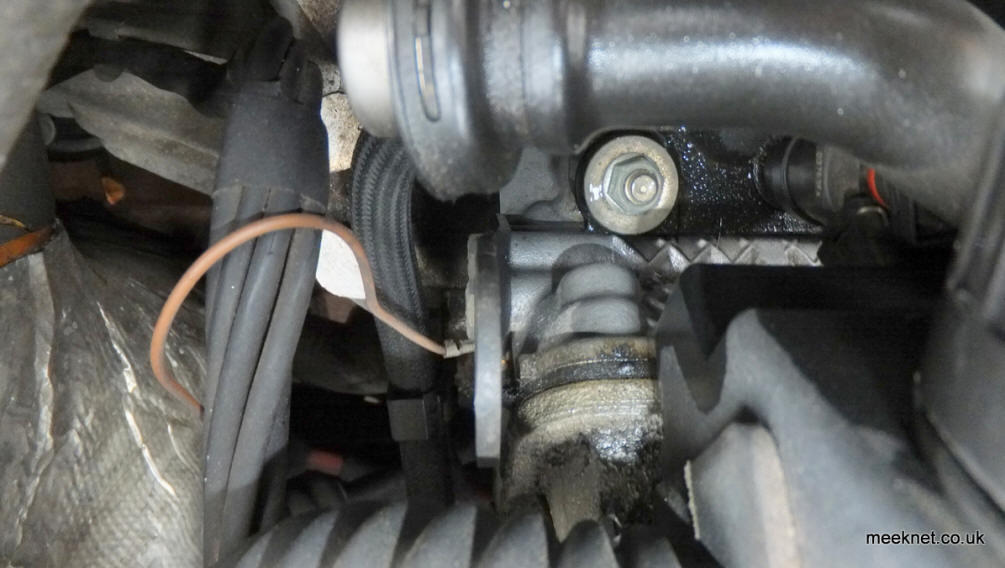
Removal of the fixing on Bank 1 was made impossible by the Jubilee clip holding the fuel line to the fuel-pressure regulator. So, oil the Jubilee clip
to make loosening easier and then use a long screwdriver from the side of the engine to move enough to get the fixing out:

We could just replace the fixings with new ones, only about £5 each (11611736648), but we have to increase the downwards pressure on the manifold
to compensate for the loss of elasticity of the manifold gasket itself rather than just that of the upper fixings.
To be honest - I've had three goes at fixing this now - and it hurts the back more each time! The first time I fitted a grommet, and that squashed flat
in a week, the next time I turned the rubbery bit over and that certainly worked. But I still wasn't happy for two reasons, I didn't like the upside-down
rubbery-bits - and, after looking at a few pictures of manifolds I realised there were ten of these fittings and not eight, I had missed the pair right at
the back of the manifold! I did a bit of measuring and I reckoned a standard M12 Form 'A' washer should fit, and it did.
How to do it: Start by removing the top cover. The 10mm nuts are covered by little plastic covers, which can be levered out. After a while, these get
quite brittle and the clasps may snap off so lever them carefully. Replacements can be bought from BMW if you break them. The M62 fitted to the E38
has push-buttons to remove the cover:
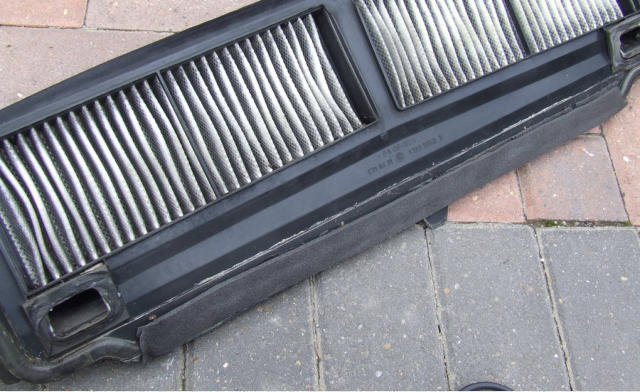
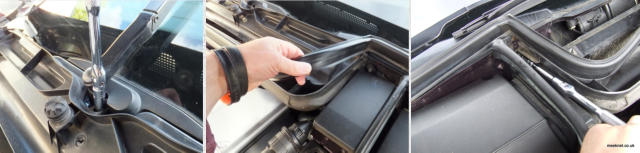
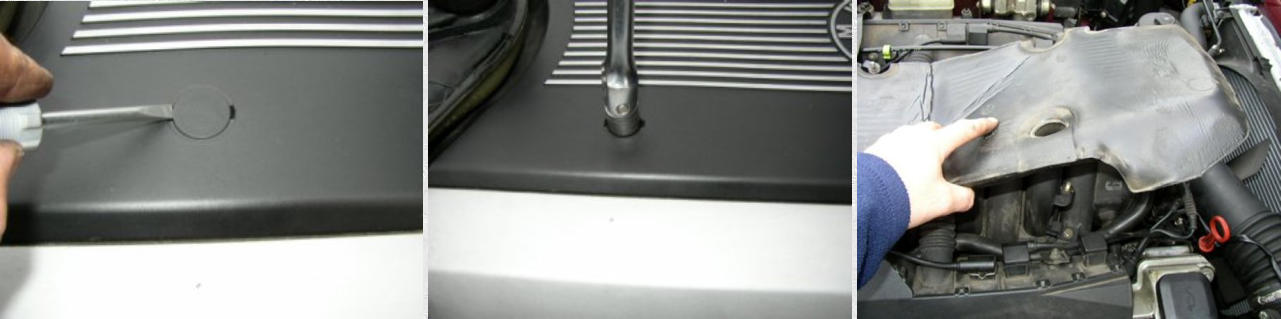
On the 8-Series, access to the two rear fixings is made so much easier with the removal of the Microfilter housing. This can be removed without
disassembly by parking the windscreen wipers in the centre of the screen and then removing the centre cone-shaped nut which is just in front of the
passenger (RHD) wiper pivot. Now remove the two 7mm self-tapping screws each side of the housing:

Although the picture above shows the cover removed, there is no need to do this, also, partially remove the rubber seal shown just to the left of the
socket wrench and the one above the microfilter housing. The complete housing can now be lifted upwards and slightly forwards and removed from
the engine bay:
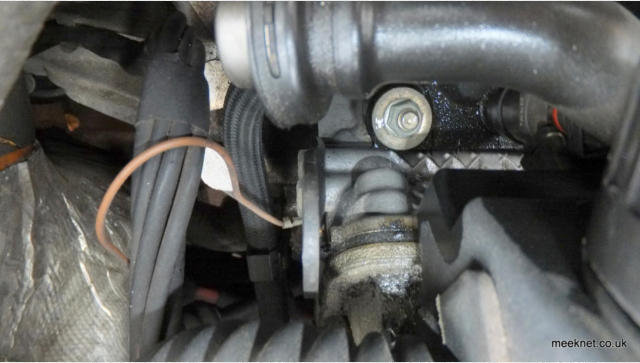
Go around all ten fixings and splosh a few drops of penetrating fluid on each of them so that the nut and stud is well lubricated. Leave for an
hour or so before attempting to remove the nuts. Use a 10mm socket on an extension to reach it, it is preferable to use a socket that is
magnetised to remove the nut, but use long-nosed pliers to retrieve it otherwise. Note that as soon as the nut moves there is no pressure on
it from the rubber compression part - this is why the manifold gasket is leaking:
Once you have worked on the fitting, rotate the Jubilee clip so it can be reached from the top, and use a small socket to re-tightened it. The fixing at
the front of Bank 1 is easier to remove once the connector to the air temperature sensor is disconnected - don't forget to plug it back in again.
After it was all stuck back together I used INPA to reset the adaptations - the additive values were pretty high due to the manifold leaks. The tick-
over was noticeably smoother and the smoothness values on INPA were well within normal limits. Isn't it better just to remove the inlet manifold and
replace the gaskets? Nah, this seems to work fine, no chance of cracking old wiring, dropping a nut into the engine, slurping a gasket through the
valves, getting a leaking injector or half-a-dozen other nightmares!
Update Spring 2015 - Got through the winter months with no more misfires when cold
Update Winter 2016 - Still going fine - very happy with this quick and easy fix for a normally fiddly and sweat-inducing procedure!
Update Winter 2017 - Got through that one OK
Update Winter 2018 - No misfires, the daily commute is lumpyness-free
All done, time for a cup of tea


As the weather cooled in the UK, the morning commute in the 840ci started off with a few misfires and general lumpiness. It only took a few
hundred yards to settle back down again but something was not right. The power was still there, but stopping at the roundabout showed a
distinct miss on one or two cylinders. INPA showed no errors, but the smoothness test showed raised levels on cylinders 3 and 4. My guess was
that I had an inlet manifold leak as I had already tackled the blanking caps and PCV. Not surprising after 150,000 miles.
I've been here before on the M60 and really didn't fancy removing the manifold with the usual hassle of of unclipping the injectors, bending the
looms at ungainly angles, messing around with the fuel rail and vent pipes and all with the possibility of something going wrong. So, I decided to
try something new - and easy!
Why can't you just tighten up the manifold nuts to seal the gaskets again? The reason is that the fixings are designed to only allow a certain
clamping force by the use of hollow guides and rubber buffers - the trouble is that after a few years the rubber components permanently
compress and there is no clamping force on the manifold gaskets and they will start to leak.
Here's a cross-section of the manifold and one of the fixings:

SEARCH MEEKNET
SEARCH MEEKNET
....Hold those parts in place with one finger and then put the end of the screwdriver on top of the stud:
Other Vacuum Leaks
Other Vacuum Leaks
Other Vacuum Leaks