TIMM'S BMW E38 LHS FUEL SENDER
REPLACEMENT
AND USEFUL
FUEL TANK INFORMATION
My E38 735i has had erratic fuel readings
ever since I got it. It was very difficult to work out exactly what was going on
as it seemed to just guess how much fuel there was in the tank. One minute I
could have 1/4 of a tank, the next minute the amber warning lamp would come on.
E38's have (effectively) two fuel tanks, the tank assembly is like a pair of
saddle bags that go across the transmission tunnel and lives under the rear
seats.
There is only one fuel pump which is fitted to the RHS saddle bag. The pump sits
in a bucket (called a surge tank) and has fuel delivered to it from both the
left saddle bag and the right. This is done by using 'Suction jets' which are
part of the fuel-return line. These work on the venturi principle where fuel
whizzing past them cause a partial vacuum and this partial vacuum slurps fuel
up. Here is a diagram of the E38 fuel tank showing where the Suction jets live
and the general shape of the tank:

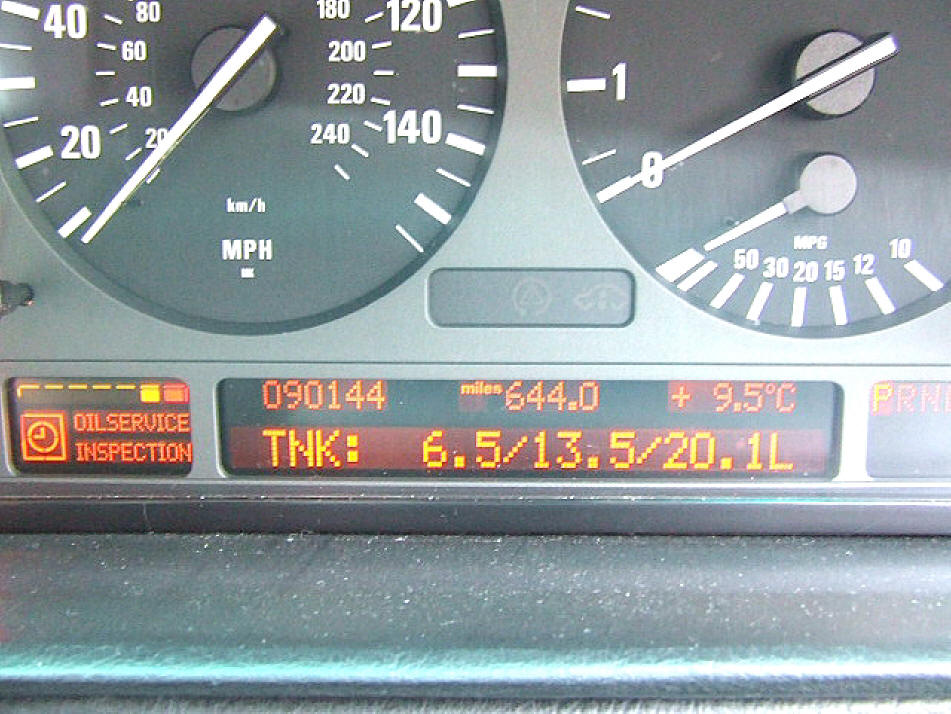
The E38 has two fuel senders, unlike the E32 which only has the one. Using the
'hidden secrets' of the OBC you can view the reading from both fuel senders
(Test No 6). Here is the display that I was getting:

The first figure (0.0) is from the LHS sender, the next (13.5) is from the RHS
sender, the last figure (13.5L) is the two figures added together and is the
figure used for the instrument-panel fuel gauge. It is pretty obvious that the
LHS sender is not giving any reading.
I've been watching Test No 6 for some time now, sometimes the LHS would give a
reading, sometimes not. You can actually slosh the fuel from one saddle bag to
the other using 'sport' turns. I could see that if the fuel was in the RHS 'bag'
then I would get a good reading on the fuel gauge, after a good 'sport' turn to
the right, the fuel would slosh into the LHS 'bag' and the fuel gauge would drop
down (very slowly) as most of the fuel was in the LHS and that gauge still
measured '0.0'.
So, time for a new LHS fuel sender, these are around £30 from BMW (I tried
EuroCarParts but they wanted £33 and they didn't have one in stock even though
the web site showed them to be £27 and in stock).
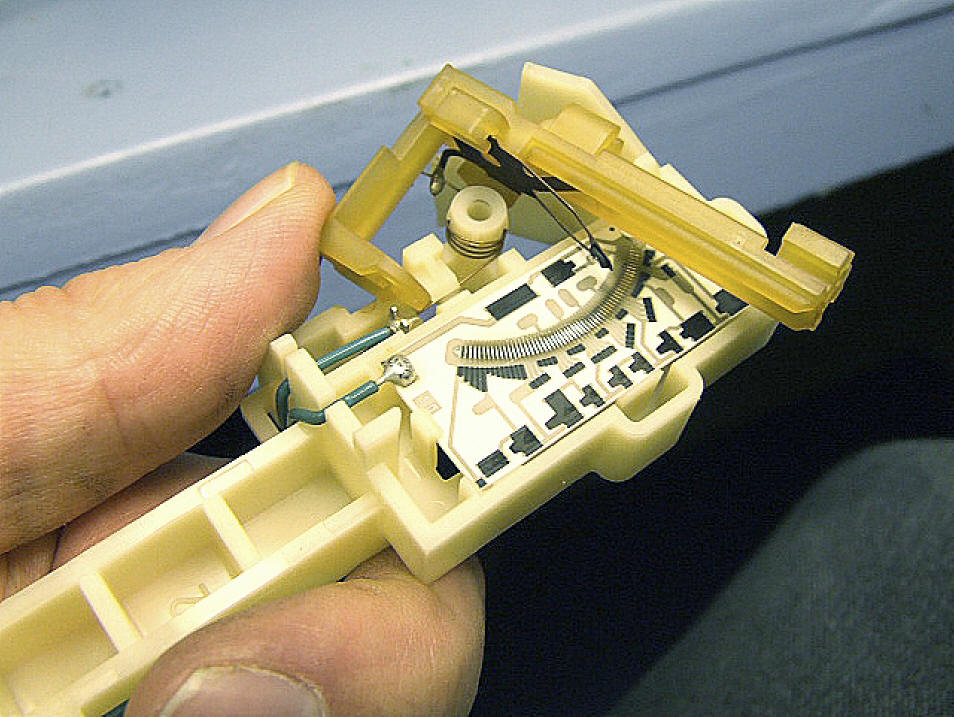
Here's what one looks like:
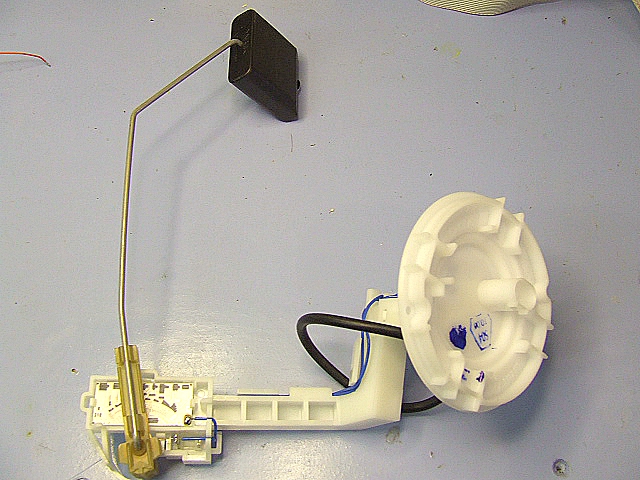
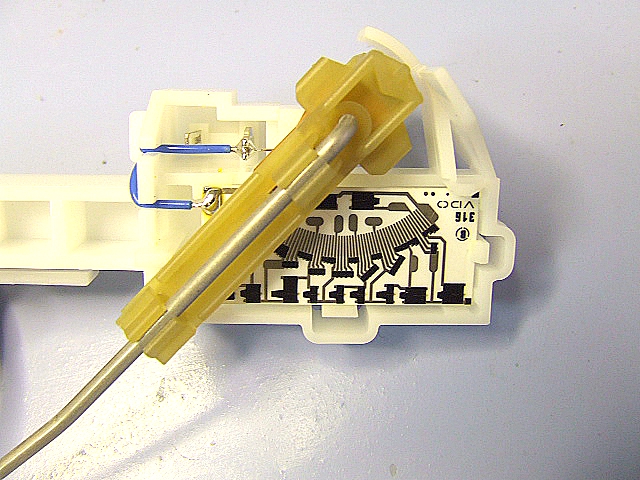
And a close-up look at the laser-trimmed resistors on a substrate:
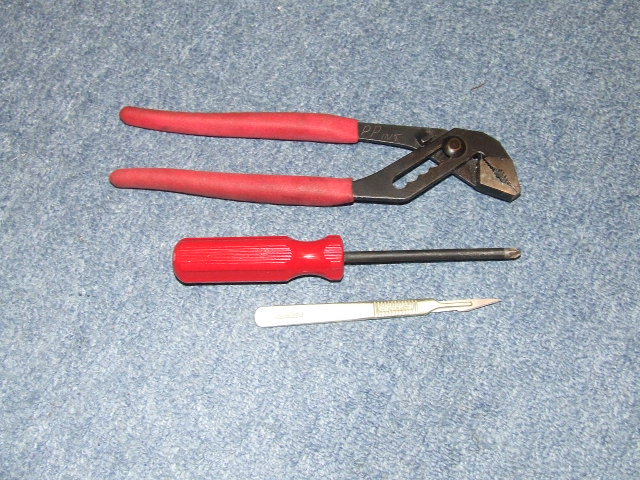
Start by giving the fat 'O' ring a liberal amount of Silicone grease, you don't
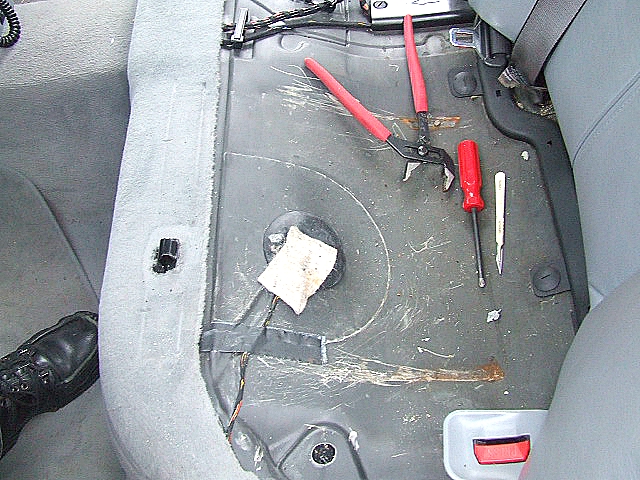
want the smell of petrol getting in the cabin. Here are the tools that you need
(not many for this job!):
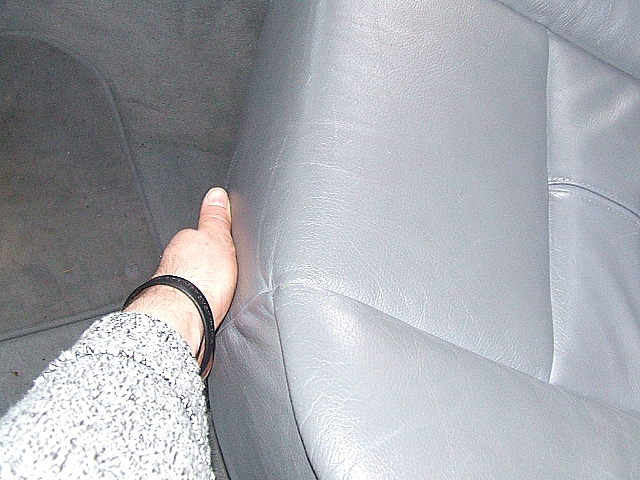
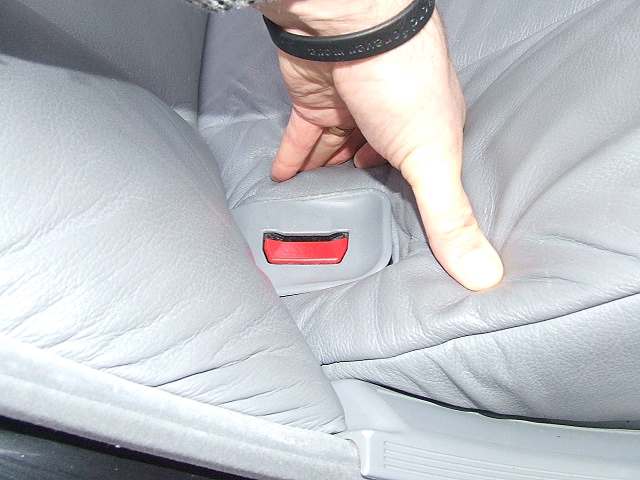
Lift out the rear seat. The seat-base just pulls up and disconnects a clip on
either side, just about in the centre of each passenger seat area:
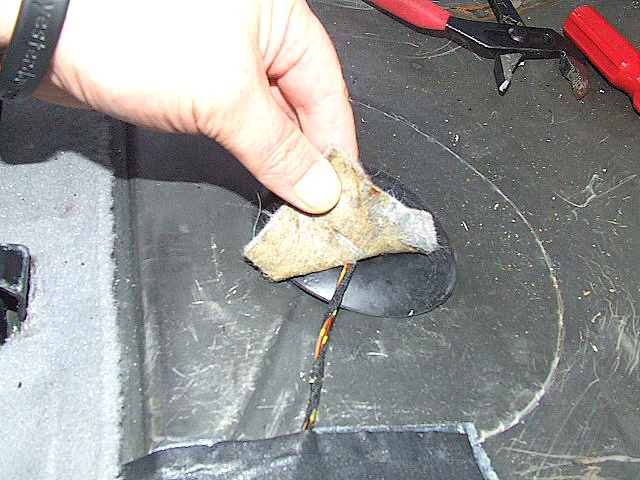
Under the seat you will find the loom that runs to the sender:
Carefully peel off the furry insulation:
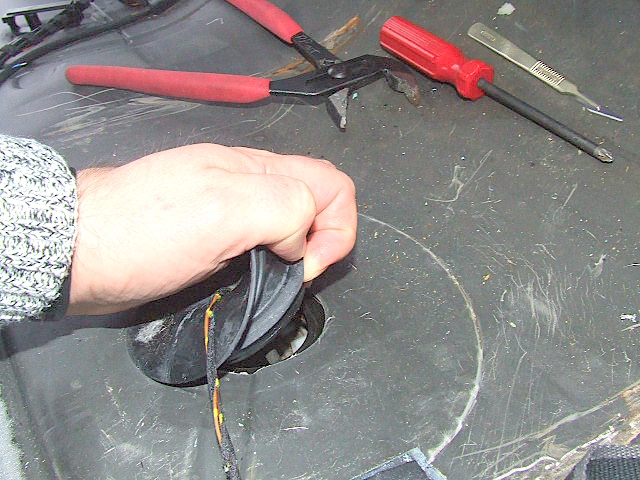
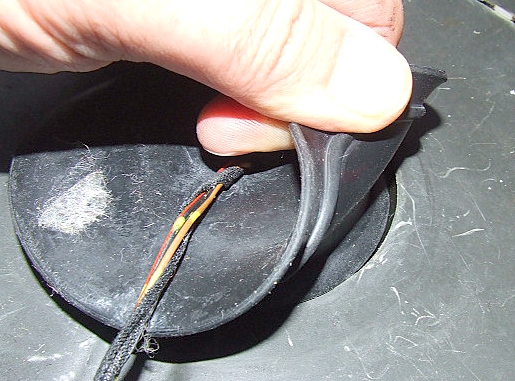
And carefully pull out the big grommet being careful not to put too much
pressure on the loom:
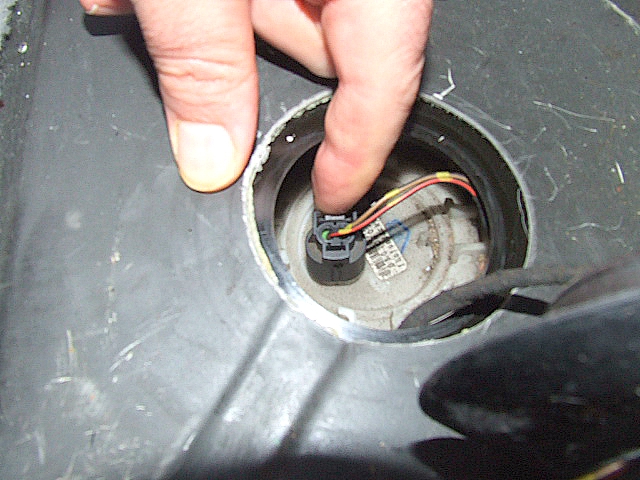
Here's the connector, I am poking the clip that needs to be pressed in as you
pull out the plug:
The foam insulation that covers the sender needs to be cut along the perforation
with a sharp knife:

Now remove the domed cover over the sender using a Pozi-drive screwdriver:
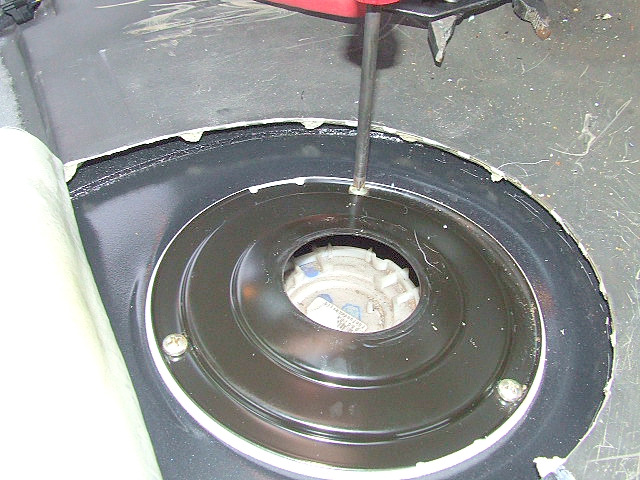
Once the cover is removed use a paint brush to clean the area around and under
the sender plate. I didn't do this and wished I had once I got the sender off!
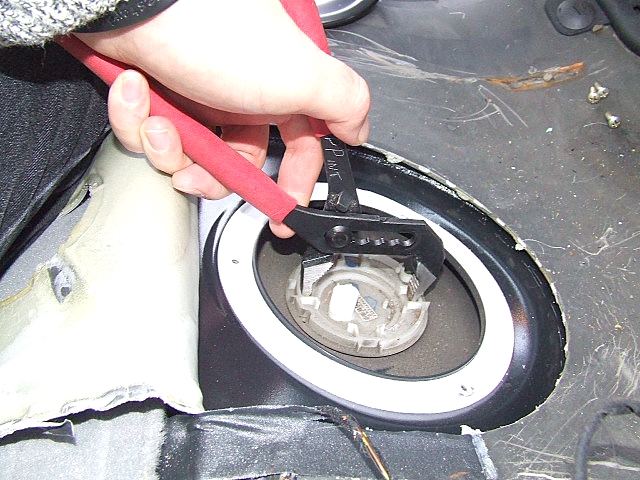
It is important at this stage that all the doors are opened, otherwise a
build-up of petrol fumes could be hazardous
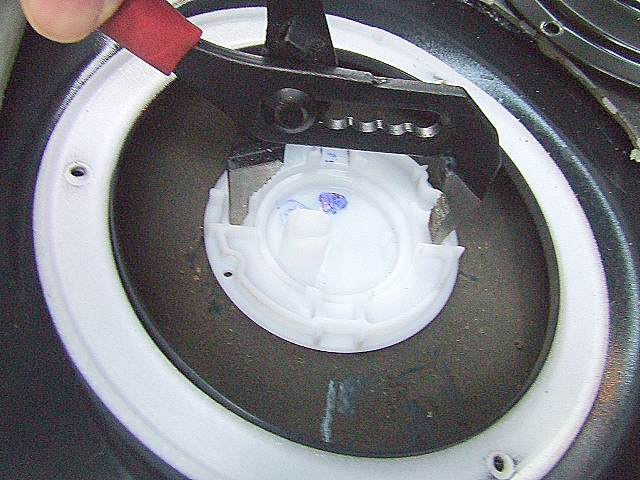
The sender can be removed using an adjustable pipe-wrench as shown, just a
quarter of a turn does it:
The fuel sender wiggles out of the hole, do not apply any force as this wiggles
out easily. If the area was clean, fitting the new sender is straight-forward,
however, I spent a little time trying to keep dirt getting in the tank. For
anti-explosion reasons I didn't take any pictures with the sender removed.
Here's the new sender going in:
Cover back on:
Insulation back on, connector back in and refit the big grommet, this pushes in
as far as the first shoulder:
Furry insulation sticks back on:
The rear seat can now be fitted in place, push in the back of the bolster first
from one side and guide it around the seat-belt trunion:
Do this one side at a time from the outside of the car, go back to the first
side and push the bolster as far back as possible, repeat for the other side and
then press down in the middle of each seat area and the clips should click back
into place. Make sure all seat belts are still available!
Right, ignition ON and try Test No 2:
That's better!
If you want to try and repair the sender rather than replace it (quite easy)
then the next section is for you!
I decided to buy a new sender because I hate working with the fuel tank, just
too much chance of contamination and explosions...but....as long as you cleaned
the sender area before removing the sender then it is possible to remove it and
then cover the hole with gaffer tape while you fiddle with the sender.
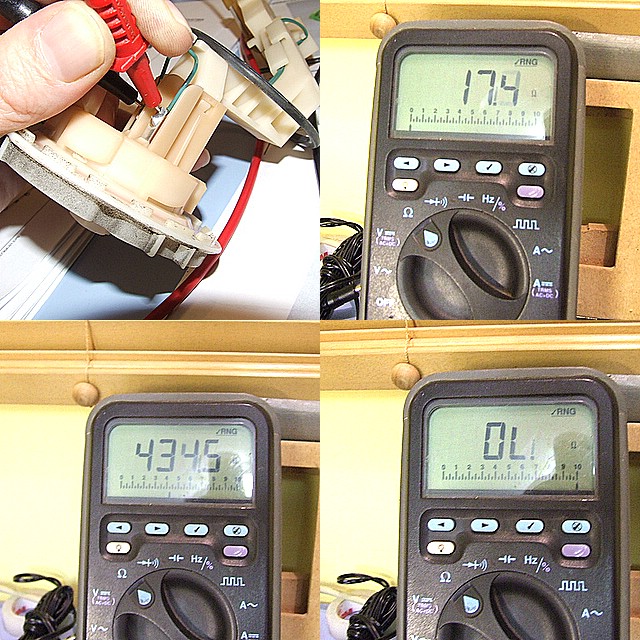
Right, here are the readings you should get from the sender:

So, connect a DVM to the contact points on the sender flange and wiggle the
float around. My sender was good unless the float was pulled in one direction.
The picture shows the contact points , float DOWN, float UP, float pulled to the
side:
That was the reason for the erratic readings, the sender would work sometimes
but not others. We can perform the usual 'contact bend' on the wiper which puts
a bit more pressure on it and moves it to a new bit of track. There is no need
to clean the wiper area.....petrol is the best contact cleaner I know of!
To add pressure first pull the float 'coat hanger' from the two clips:
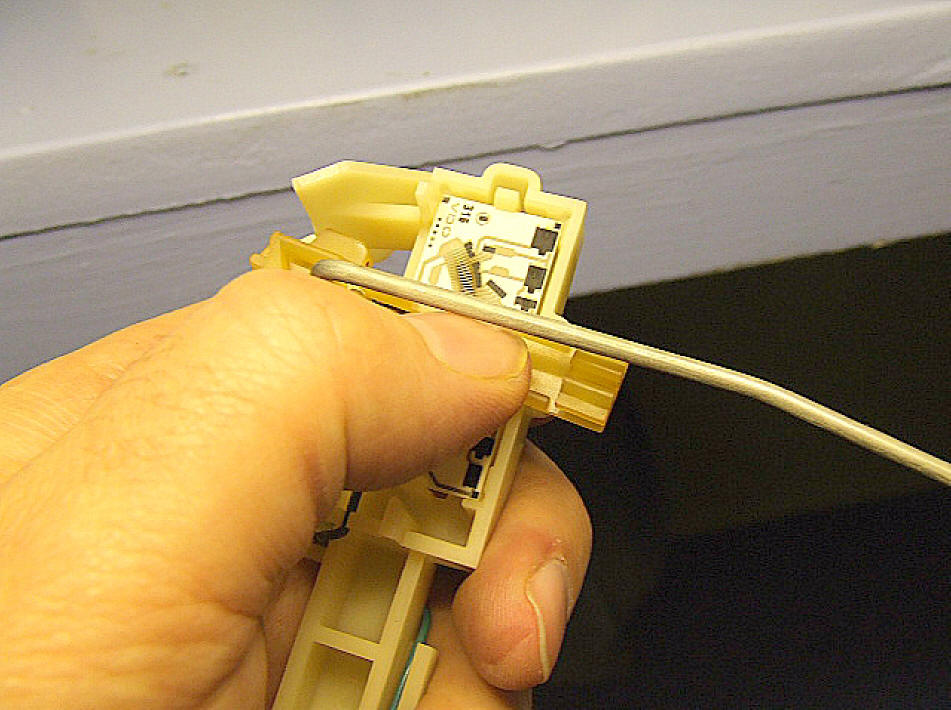
And pull the wiper arm away from the body so that access can be given to the
wiper arm contact. Use a pair of long-nosed pliers to give it a bit of a tweak
downwards and add a slight kink, this will move the wiper to a new area and add
a bit of pressure:
Reassemble the sender a give it a good test with the DVM....all OK now!
All done...time for a cup of tea!

![]()
