TIMM'S BMW E32
MICROFILTER
REPLACEMENT AND SWORD REMOVAL RHD
I was getting very little air from the vents of my E32 so decided to replace the Microfilter. The only information I could find was on LHD cars, quite useful until you try and get the filter past the steering column! With a bit of help from Martin (Coyote) it all became clear how it was done. The change to the amount of airflow is quite amazing, even on the lowest settings there is loads of air and it is so much more quiet as the fan only has to run at the lowest speed.
The work needs to be done on a dry day because most of your body will be outside the car, you will need a mat to kneel on and a Torx drive (screwdriver type) as the normal 1/4" drive will not fit down the recessed fixing holes. I didn't have one (who does), and had to use a flat-bladed screwdriver that perfectly fitted the Torx head (I know, call me Bodger). As they say, it's quite easy when you know how, but it is rather fiddly and you will spend a certain amount of time bent in funny positions cursing things you can't see properly.
You will need a torch, pozidrive screwdriver, flat-bladed screwdriver, new Microfilter and a certain amount of patience. The old filter can be cleaned by reverse airflow from an airline or washed and then dried but it is preferable to use a new one. This work was done on a 1993 730i V8 RHD. Start by removing the carpeted cover to the left of the pedals......
EDIT: Not all E32's have a Microfilter. Check just inside the Glove Compartment
for the 'Pollen filter fitted' sticker....if you can't find it then you may well
not have a Microfilter.....
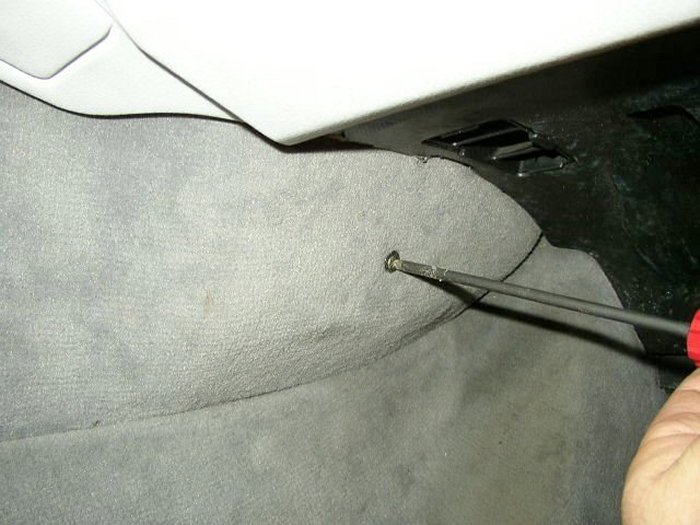
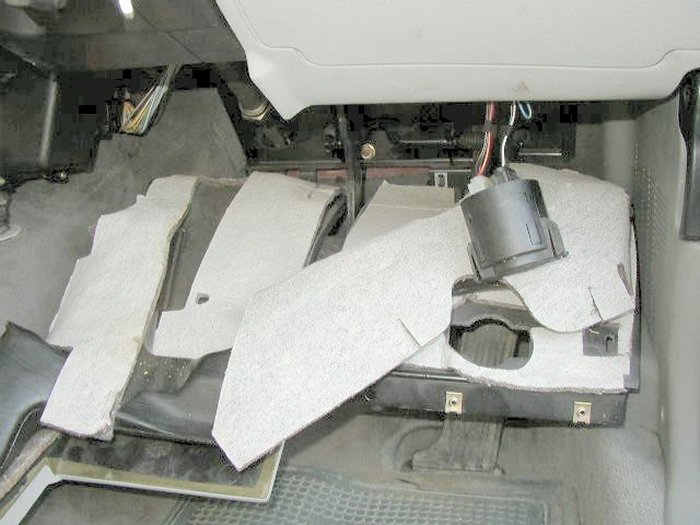
The pedal kick-panel needs to be removed next. Undo the lower three plastic
screws half a turn.......
Then undo the four upper screws. The speaker 'Lady of the bongs' needs to be
popped out by squashing the tabs together and pushing it through the
panel.......
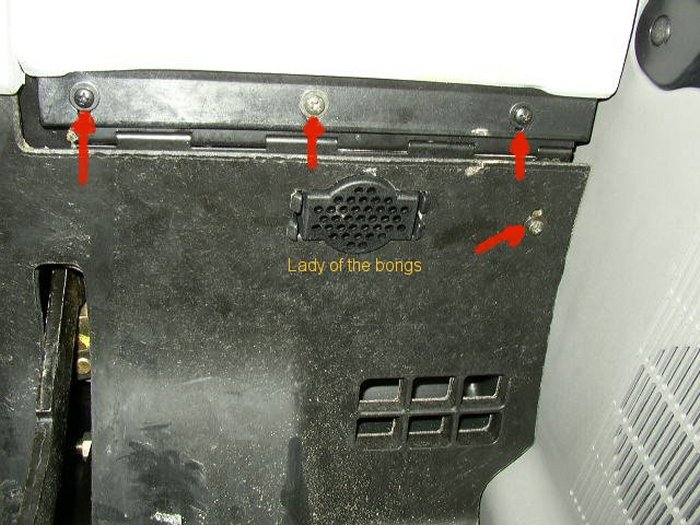
Next, uncrew the fixing on the left-hand side of the upper panel......
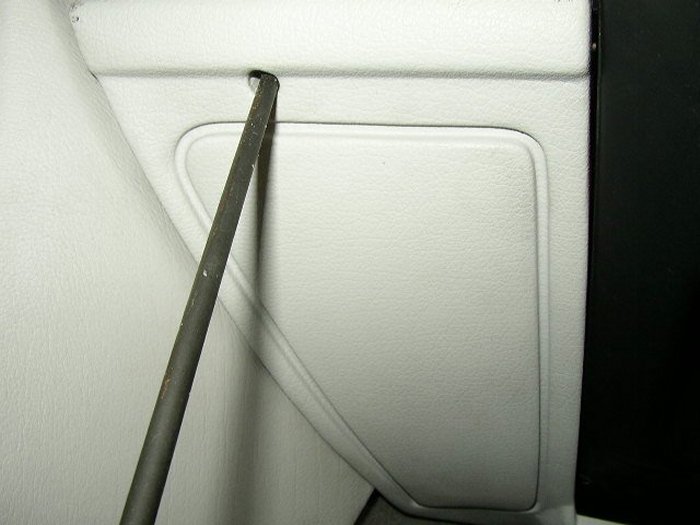
Now carefully remove the entire panel as shown here. The Lady of the bongs
should be dangling around happily. The panel also contains the plastic pipework
that directs air onto your feet, this normally connects to the outlet pipe to
the right of the central console.....
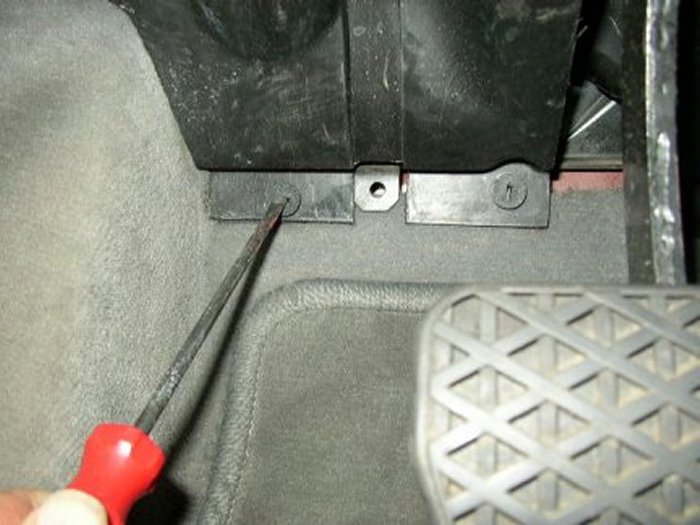
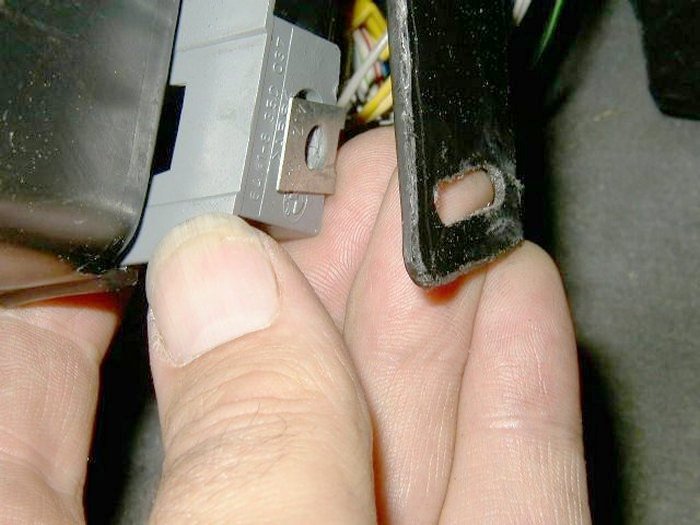
Where the carpeted cover (the bit you took off first) was fitted there is a
fixing to accept that screw, this must be removed to get enough room for the
later stages. Squash the edges of the fixing together and it will slide out of
its rails....NOTE: I took this picture out of sequence, the bit with the
elongated hole to the right of the fixing is part of the panel that has just
been removed and will not be present if done in the correct sequence. During
re-assembly I actually screwed this to the fixing and then wondered why I
couldn't screw the carpeted cover back in and why I was a screw short! During
reassembly these parts must be aligned when the carpeted cover is fitted......
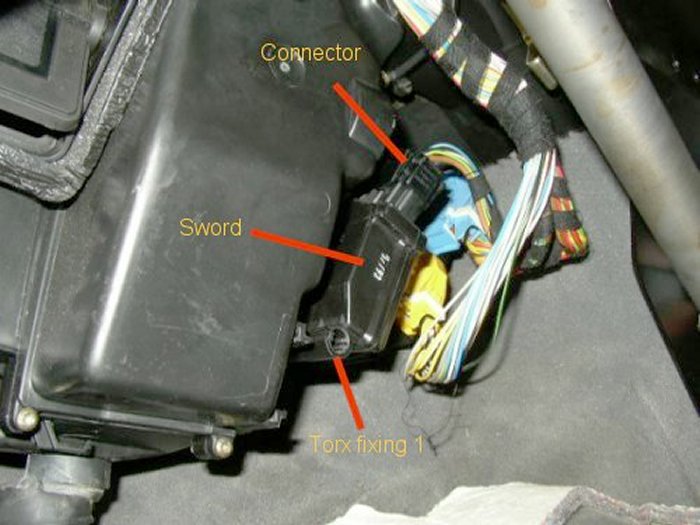
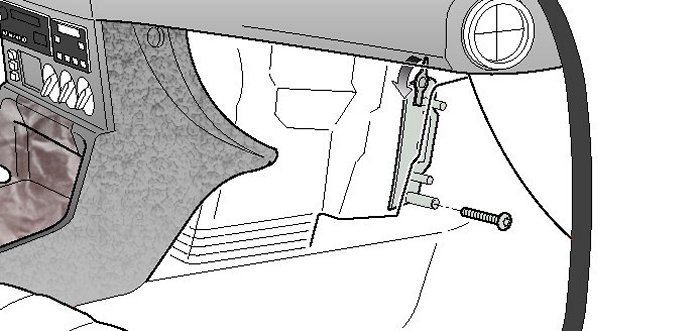
Right....that was the easy bit....now it's time to hook the Sword out. The
picture shows the Sword in position, the bunch of wires and connectors seen
behind connect to the A/C control module, this slides from side to side and has
another connector in the passenger footwell so don't try and pull it out.
Disconnect the upper connector from the Sword (by squashing the tabs together),
you will find a recessed Torx screw behind it, undo this fixing. The Torx screw
will not come out as it is captive. Unless you have a long shank on a 1/4" Torx
drive it's not going to fit, you will need the screwdriver type. Undo the lower
fixing and then wiggle the Sword out of the bulkhead........
Here's a view of the hole that the Sword was fitted to.....you cannot see the
upper fixing so I'll pinch a bit out of a diagram to show it better. The fixing
here needs to be unscrewed first...again it is a recessed, captive Torx......
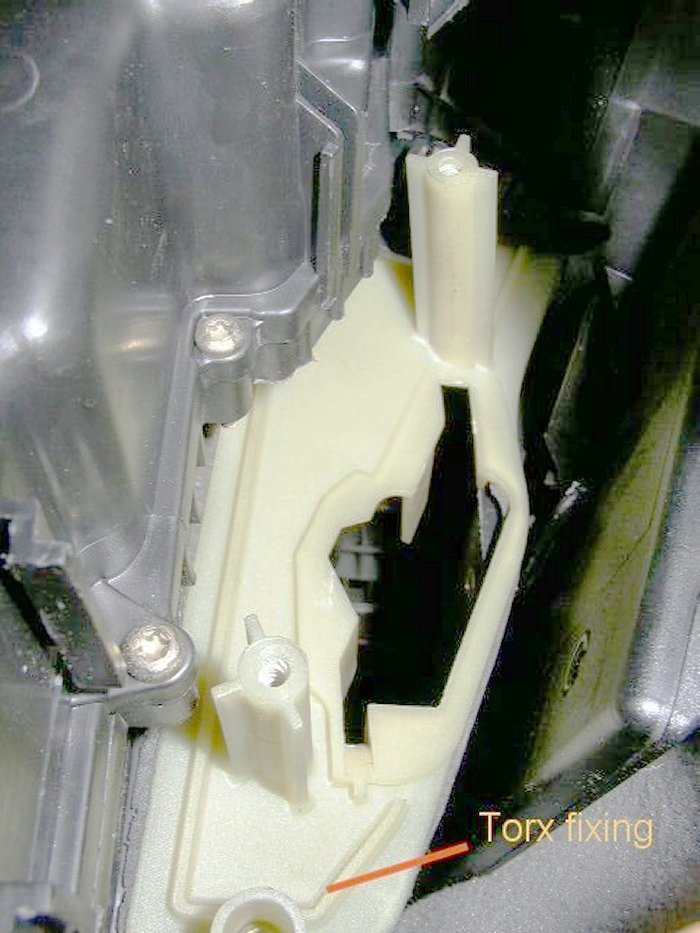
Here's the diagram showing the upper fixing. It is a plastic catch that you need
to rotate as shown, don't put too much pressure on it as it IS plastic. The
cover can now be removed by...well...basically fiddling with it, turning it,
cursing it until it comes out as though nothing was holding it in the first
place.......
Right! Now time to get the filter out. This completely stumped me for ages, the
filter would come half out and then hit the steering column. I could see it was
made in two halves but it would not pull apart. Fortunately Martin was online
and tells me it slides!! So here's how it's done...where the cover was removed
you will be able to get your fingers around the edge of the filter, pull it out
and then slide one half as shown......

Slide it further apart and work it around the steering
column......whoopee...it's out.....
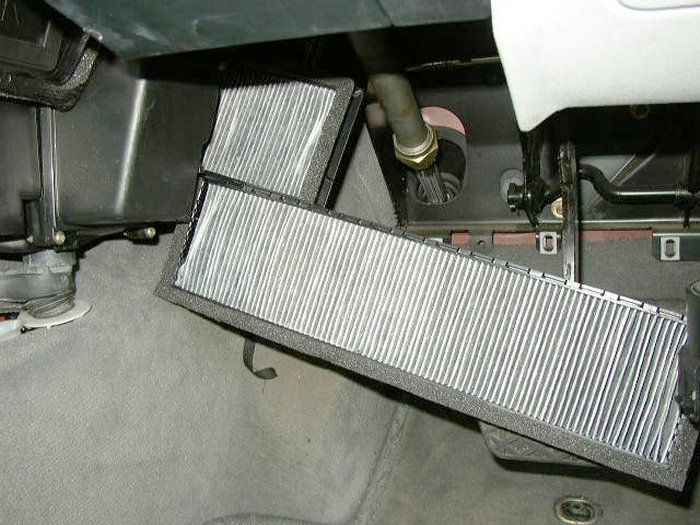
The previous picture shows a lovely clean filter, that's because it's the new
one. The one you take out will be full of dirt, flies, bumble-bees and leaves. A
certain amount of hoovering is required to clean out the air-filter housing. Be
careful, the evaporator is in there, while you're at it get some of that spray
stuff that kills bacteria on the evaporator, you don't want to be doing all this
again for a while.
Fit the new filter using the same method as removal, note that the airflow is from the front of the car, the new filter will have arrows showing the airflow direction to ensure that it is fitted in the correct orientation. The tricky bit (I found) was getting the plastic cover back on after the filter was put in. This just sort of wiggles into place but once it's in it feels right and the catch can be rotated to lock it into place.
The sword also has to be fiddled into place but it does go in quite easily. As usual, fitting the panel back in place is a bit awkward, you have to ensure that the pipework fits correctly over the air exit from the central console. You can check that the lower flap is working while you're at it by running up the A/C, the flap is fully open when 'air in all directions' is selected and half open in 'Auto'. It should fully close when the ignition is off.
All done...time for a cup of
tea......Timm.....

![]()
