Timm's BMW E31, E32, E39 and E38 M60/M62
Timing Chain Tensioner Replacement - Info
Replacing the timing chain tensioner is highly recommended to increase the life of the V8's, in particular the integrity of the timing chain guide
rails. When the tensioner wears or becomes gummed up with old oil, the timing chain can slap around destroying the guide rails.
The tensioner is a hydraulic device rather than just a sprung piston - the action of the tensioner relies on the condition of the
piston and cylinder. The spring is much too weedy to take the large forces exerted on it by the camshafts (which are accelerated
and de-accelerated by the valve springs via the tappets). Without hydraulic action the tensioner will do very little - and it will do
nothing if it gets gummed up (which they often do)
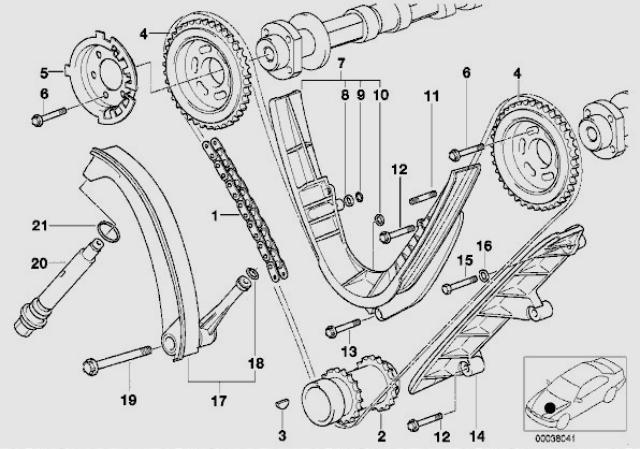
Although replacing the tensioner is quite easy, replacing the guide rails isn't! The timing chain on the M60, M62 and M62TU is tensioned by a
single tensioner that acts on guide rails as shown below (the tensioner is part # 20):

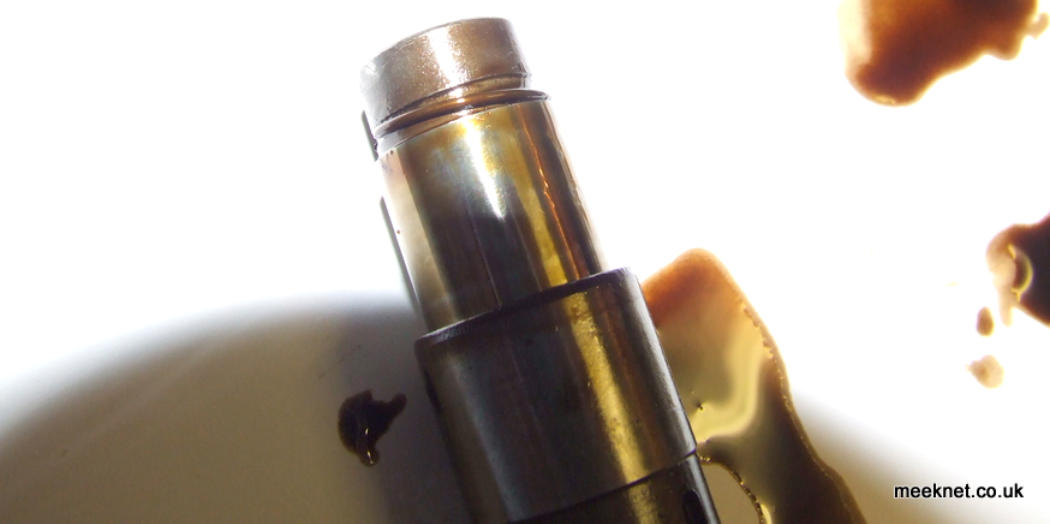
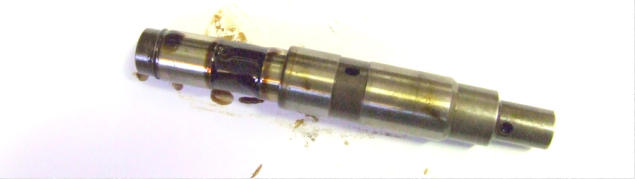
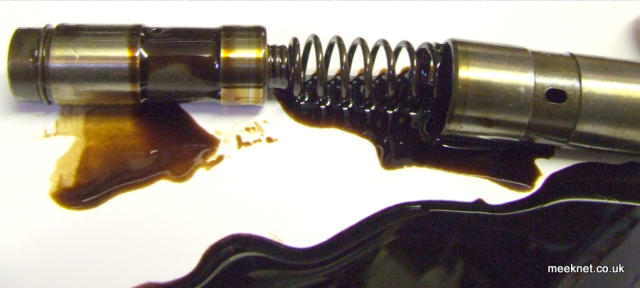
The chain on my E31 was getting a bit rattly so it was time for a new tensioner. The tensioner consists of a precision-machined cylinder
which has a spring inside that acts on a piston. It is usually full of oil and this acts just like a hydraulic tappet, it takes up all back-lash and
keeps the guide-rails in contact with the chain at all times. Let's have a look at the tensioner. Here is what the tensioner looks like when
removed from the car:
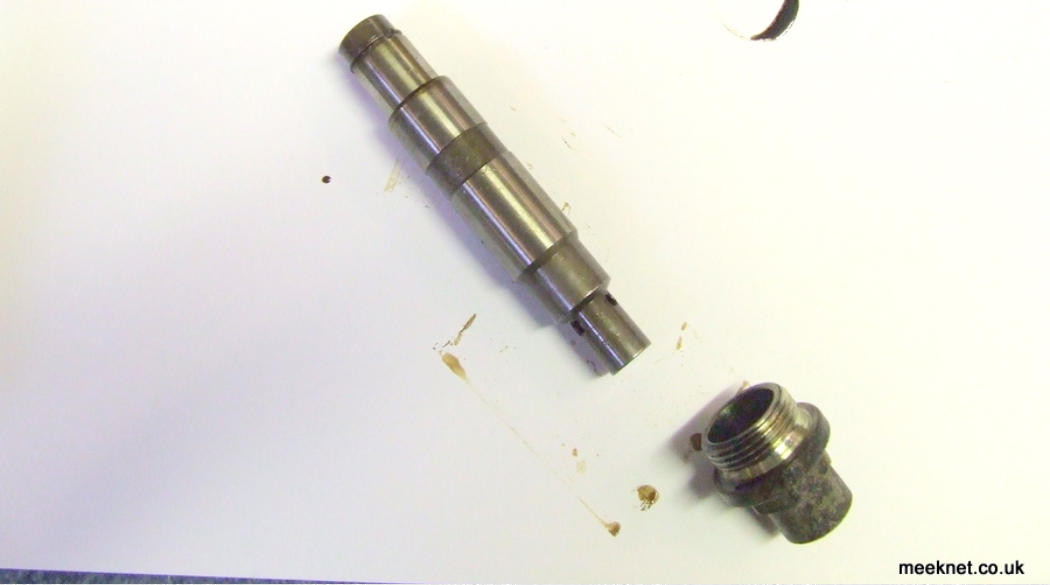
The hollow bolt at the bottom holds the tensioner in place, the top of the tensioner acts against the guide rail. Next, I have pulled the
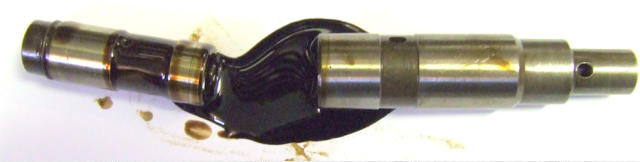
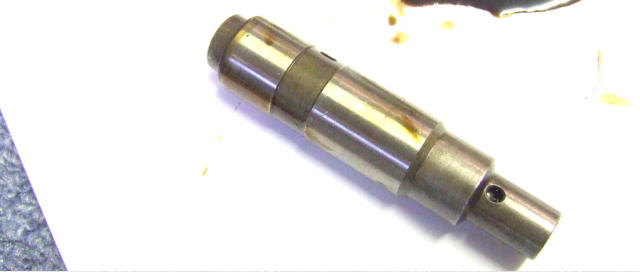
moving piston from the cylinder:
And now I have tipped out the spring:

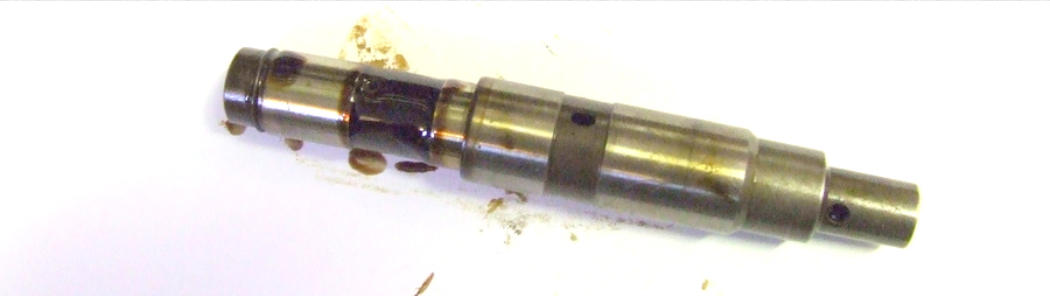
The old tensioner was pretty much gummed-up, when I removed it from the engine the piston was stuck in the cylinder, it was definitely
time for a new one. The timing chain on the M60, M62 and M62TU is tensioned by a single tensioner that acts on guide rails as shown
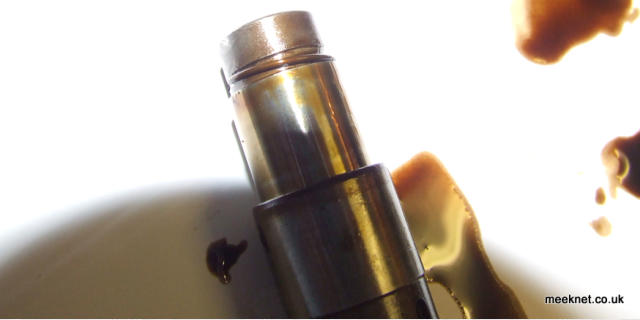
above (the tensioner is part # 20). When I got the new one out of the box it looked like this:

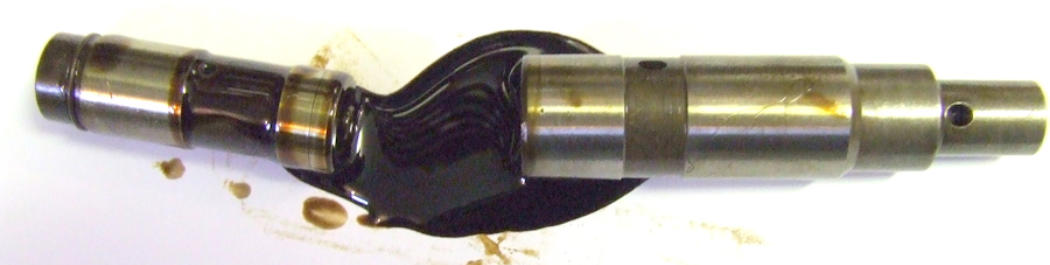
Yes, the piston is pushed right inside the cylinder.....so I gave it a squash.......
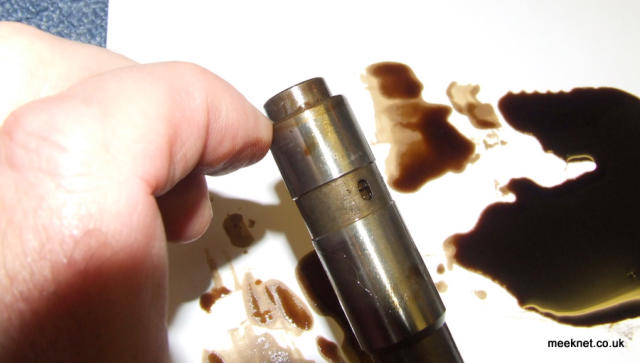
....and the piston came flying out! It wouldn't stay in either as the spring was much longer. So, how do you get it in the engine with the
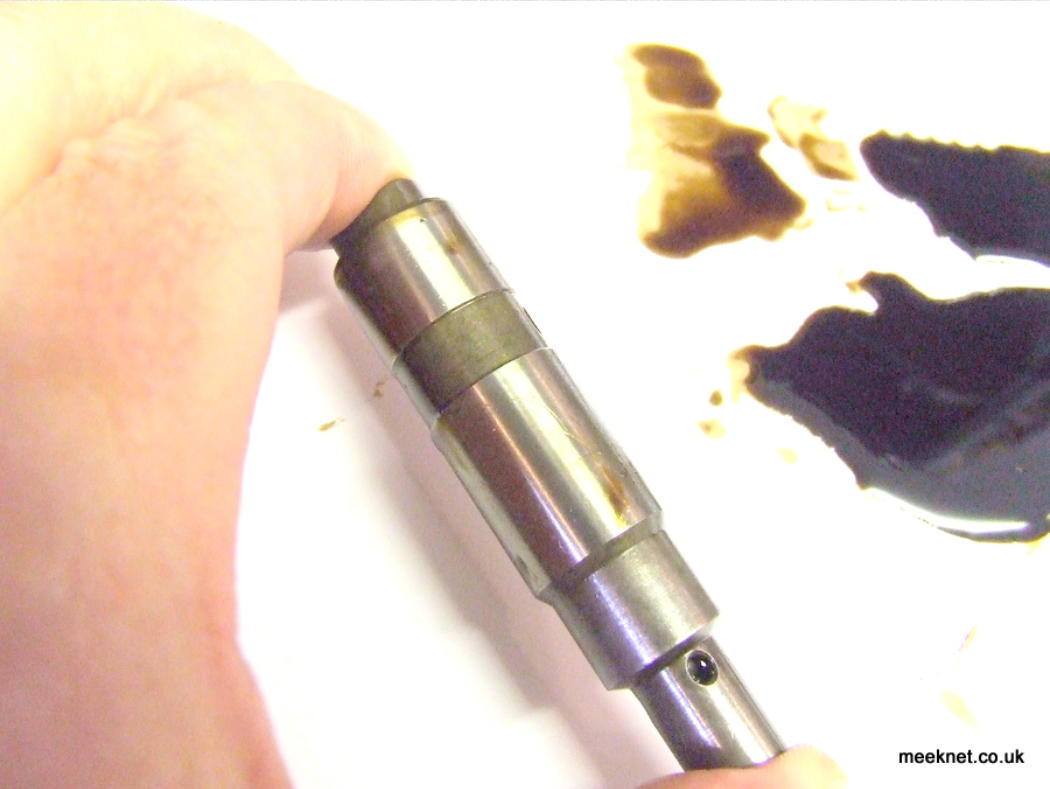
piston hanging out? Well, it took a while but I worked it out in the end. At the end of the piston is a small wire clip on a smaller diameter:
As you can see above, if you poke the clip downwards a bit it rides up on a chamfer. The trick to get the piston to stay put is to squash the
piston in and use your nail to push the clip towards the cylinder:

There is a slight under-cut in the cylinder and the clip partially enters it and holds the piston in place ready for insertion into the engine.
As soon as the engine starts running the piston is pushed towards the cylinder, the clip pops out of the undercut and the piston pops back
out again ready for action....very clever!
Replacing the tensioner is very easy as long as you have a deep 19mm socket or a universal-joint extension....and I haven't got either of
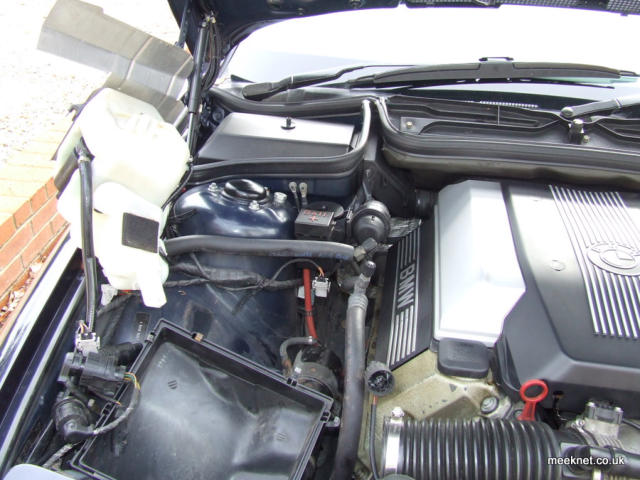
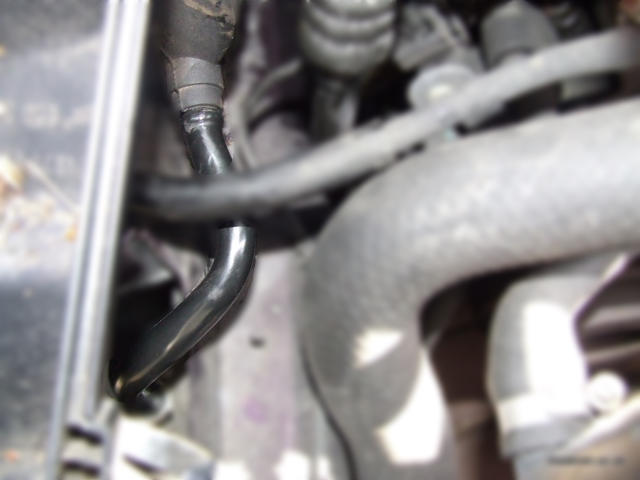
those so it was a bit awkward. Here we go: First, remove the top of the air-filter box and MAF in one lump. The lower part of the box is not
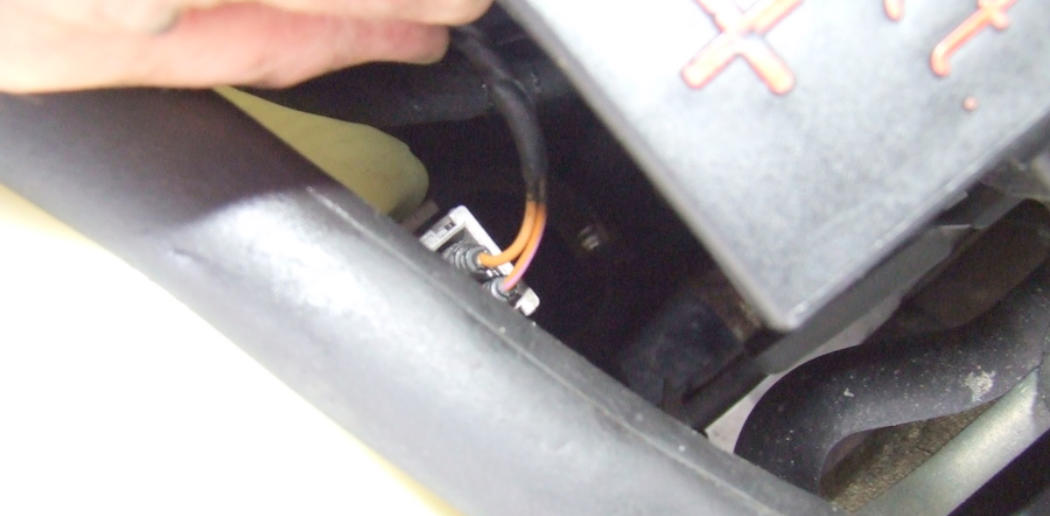
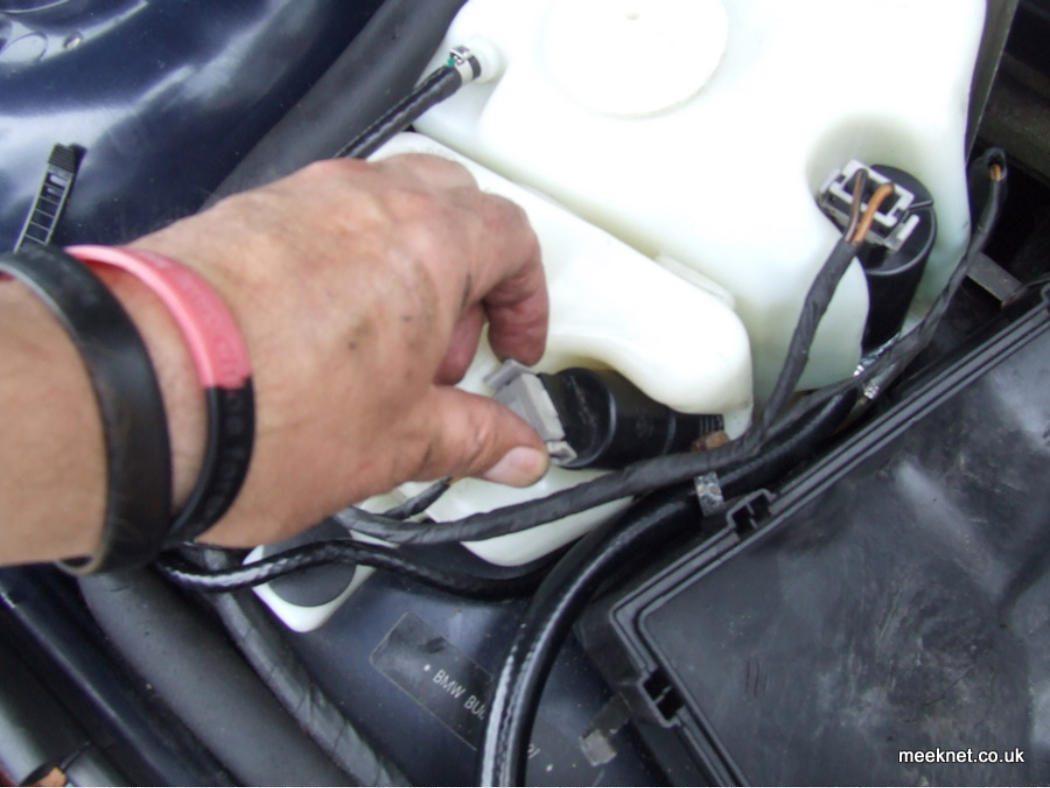
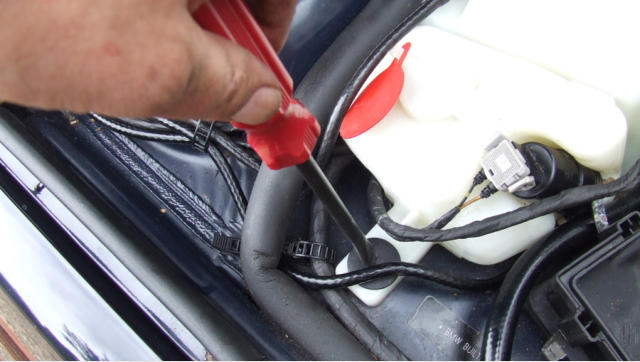
easy to get off without removing the headlight, so that's staying! The washer reservoir's need to be moved out of the way, so disconnect the
plugs, remove the single fixing and lift out of the way:


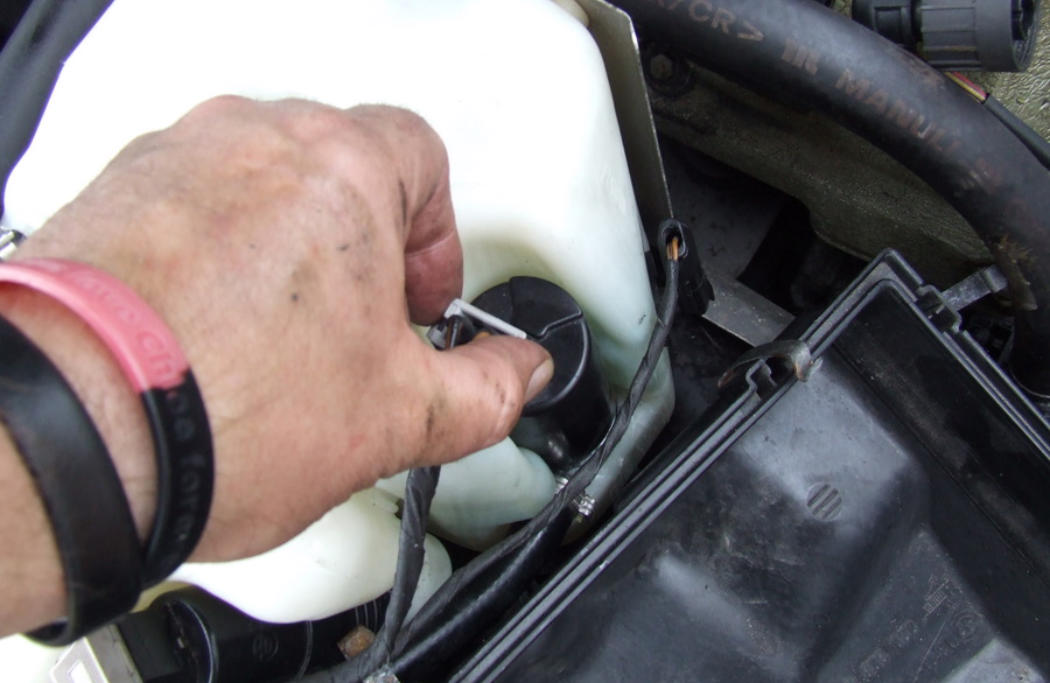
The reservoir's can be moved out of the way, it can be completely removed but this would necessitate replacing the one-time-only pipe
clamps - and I can't be bothered to do that!

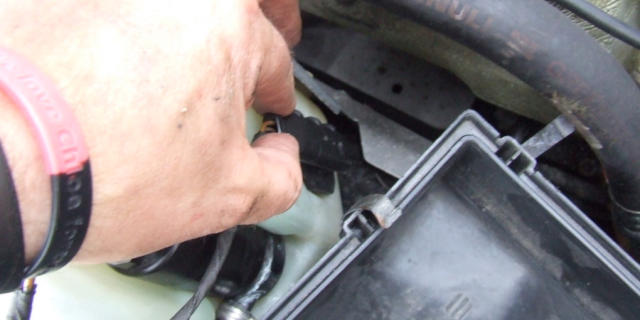
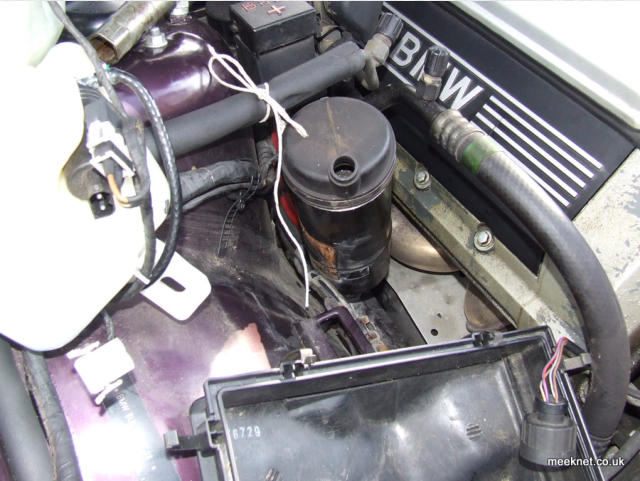
The second time I did this (on my new E31), I removed the charcoal canister that can be seen in the picture above. It is held by a clamp
which is secured by a 10mm bolt. Remove the bolt entirely. The canister has two pipes at the back, and one at the front which can easily be
removed. Pull the semi-rigid pipe from the plastic clamps, and then pop it out of the rubber device at the front of the canister:

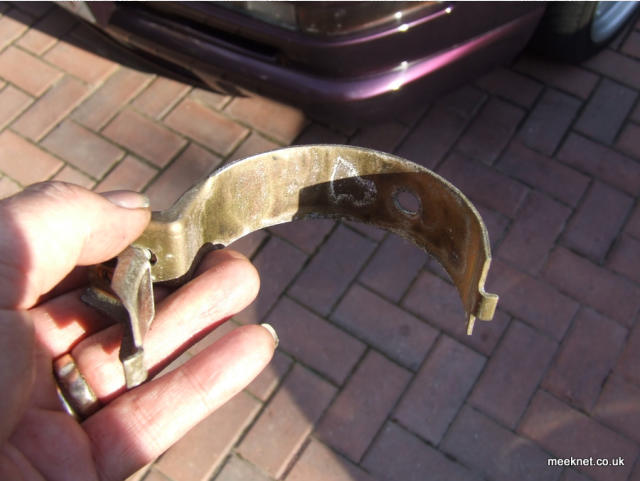
The clamp that holds the canister in place looks like this, it is in two parts once the bolt is removed:

As you lift the canister upwards, the lower half of the clamp will come loose, get ready to catch it (I, obviously, had to fetch it from the
exhaust manifold):

Push the canister backwards to clear the airbox, then lift the front of it and tie it out of the way:

With those parts out of the way you can now get a 19mm socket onto the tensioner cap. Now, if you had a deep 19mm socket this would
be really easy, instead, I've got a normal one and can manage about a 16th of a turn each go due to the pipework from the A/C
compressor getting in the way. The following two pictures are from the first time I changed the tensioner:

The second time, I had purchased a longer 19mm socket, but it was still not long enough. In retrospect, this would be simple if a
universal-joint was used on the socket wrench (which I seem to have lost). The tensioner cover points downwards at such an angle that a
standard socket wrench cannot be fitted on the long socket - the universal joint would solve this problem. After scrabbling through half-a-
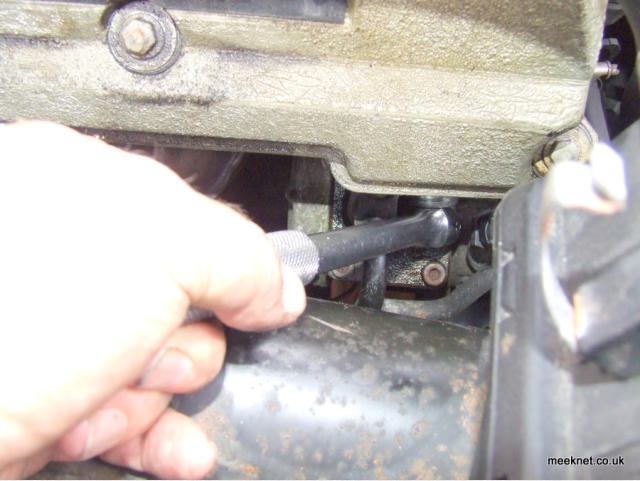
dozen old toolboxes I found a 19mm/17mm box spanner - chopped off the 17mm end with a hacksaw and used a tommy-bar:
The box spanner and the tommy-bar worked quite well, and I was able to get quite a bit of torque on it when fitting the new tensioner.
There will be a few drops of oil come out as the tensioner is removed, it makes the socket pretty slippery, but once the cover is cracked with
the socket it will spin out quite easily. The tensioner itself will slide out with the cover, place it somewhere where the oil that leaks out if it
does not cause any damage.
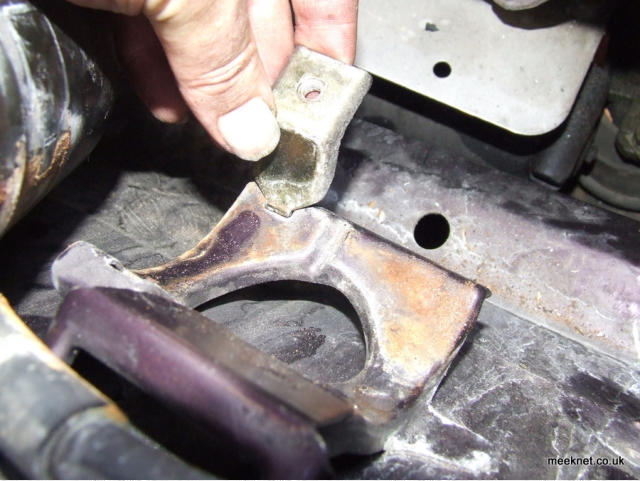
With the tensioner removed, ensure that the crush-washer came out as well (No 21 in the diagram). Clean the face of the timing cover with
a cloth to ensure a good mating surface. Fit the new crush-washer to the new tensioner cover, fit the tensioner to the cover and slide it into
position. Tighten by hand as much as possible and then use the wrench to give it a good 20NM torque (about a grunt and a slight heave)
and the new one's in
When re-fitting the canister, place the lower-half of the clamp in place and drop the canister over it to hold it in place while you fit the top half:
Grease the end of the semi-flexible pipe so it is easy to pop it back in the canister:

Get the pipe near the plastic pipe-clamps and then poke it back in the canister, then push the pipe into the two plastic pipe-clamps:

When the engine is first started it will make some scary noises, but as soon as the oil gets in the cylinder it will soon sound lovely.
Time for a cup of tea!


SEARCH MEEKNET
SEARCH MEEKNET
Timm's BMW E31, E32, E39 and E38
M60/M62
Timing Chain Tensioner Replacement - Info
Replacing the timing chain tensioner is highly recommended to increase
the life of the V8's, in particular the integrity of the timing chain guide
rails. When the tensioner wears or becomes gummed up with old oil, the
timing chain can slap around destroying the guide rails.
The tensioner is a hydraulic device rather than just a sprung
piston - the action of the tensioner relies on the condition of the
piston and cylinder. The spring is much too weedy to take the large
forces exerted on it by the camshafts (which are accelerated and
de-accelerated by the valve springs via the tappets). Without
hydraulic action the tensioner will do very little - and it will do
nothing if it gets gummed up (which they often do)
Although replacing the tensioner is quite easy, replacing the guide rails
isn't! The timing chain on the M60, M62 and M62TU is tensioned by a
single tensioner that acts on guide rails as shown below (the tensioner is
part # 20):
The chain on my E31 was getting a bit rattly so it was time for a new
tensioner. The tensioner consists of a precision-machined cylinder which
has a spring inside that acts on a piston. It is usually full of oil and this
acts just like a hydraulic tappet, it takes up all back-lash and keeps the
guide-rails in contact with the chain at all times. Let's have a look at the
tensioner. Here is what the tensioner looks like when removed from the
car:

The hollow bolt at the bottom holds the tensioner in place, the top of
the tensioner acts against the guide rail. Next, I have pulled the moving
piston from the cylinder:
And now I have tipped out the spring:
The old tensioner was pretty much gummed-up, when I removed it from
the engine the piston was stuck in the cylinder, it was definitely time for a
new one. The timing chain on the M60, M62 and M62TU is tensioned by a
single tensioner that acts on guide rails as shown above (the tensioner is
part # 20). When I got the new one out of the box it looked like this:
Yes, the piston is pushed right inside the cylinder.....so I gave it a
squash.......

....and the piston came flying out! It wouldn't stay in either as the spring
was much longer. So, how do you get it in the engine with the piston
hanging out? Well, it took a while but I worked it out in the end. At the
end of the piston is a small wire clip on a smaller diameter:
As you can see above, if you poke the clip downwards a bit it rides up on
a chamfer. The trick to get the piston to stay put is to squash the piston
in and use your nail to push the clip towards the cylinder:
There is a slight under-cut in the cylinder and the clip partially enters it
and holds the piston in place ready for insertion into the engine. As soon
as the engine starts running the piston is pushed towards the cylinder,
the clip pops out of the undercut and the piston pops back out again
ready for action....very clever!
Replacing the tensioner is very easy as long as you have a deep 19mm
socket or a universal-joint extension....and I haven't got either of
those so it was a bit awkward. Here we go: First, remove the top of the
air-filter box and MAF in one lump. The lower part of the box is not easy
to get off without removing the headlight, so that's staying! The washer
reservoir's need to be moved out of the way, so disconnect the plugs,
remove the single fixing and lift out of the way:


The reservoir's can be moved out of the way, it can be completely removed
but this would necessitate replacing the one-time-only pipe clamps - and I
can't be bothered to do that!
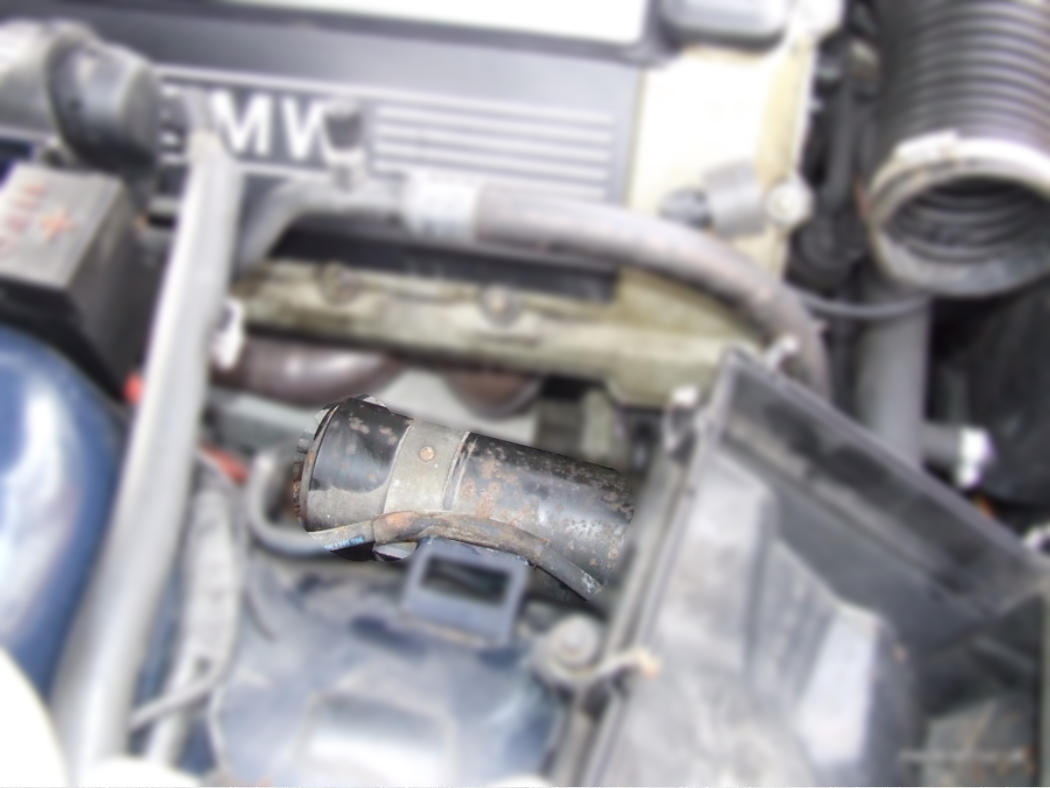
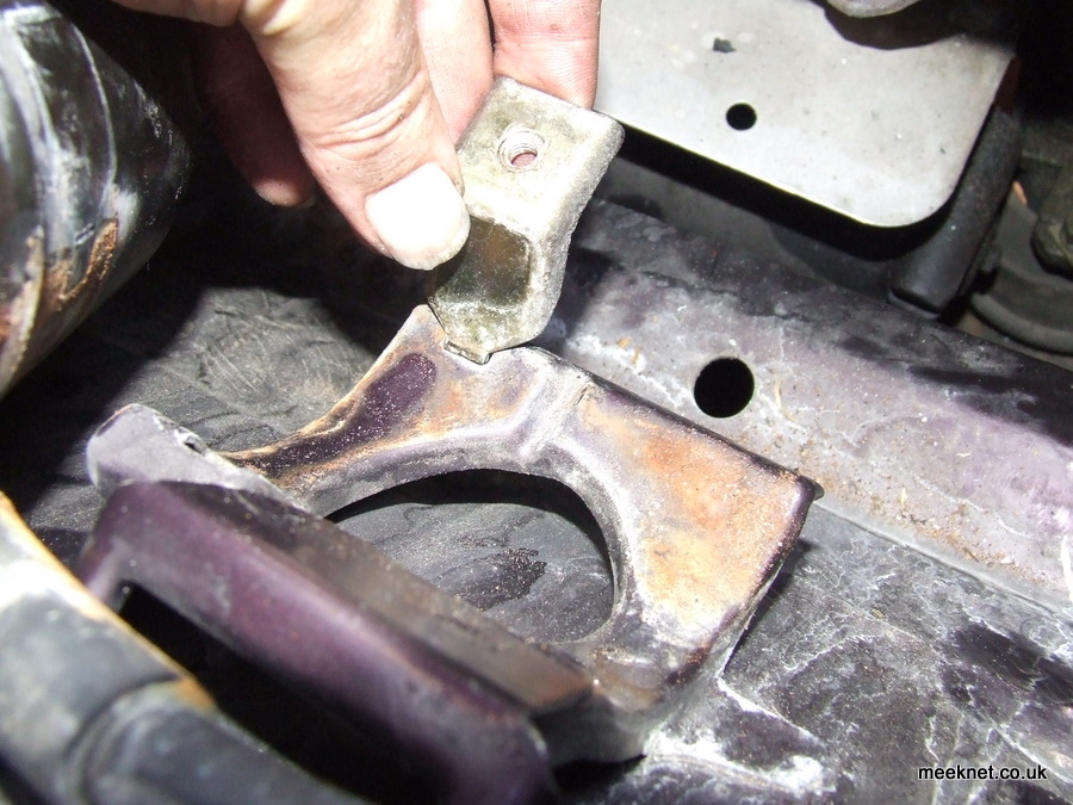
The second time I did this (on my new E31), I removed the charcoal
canister that can be seen in the picture above. It is held by a clamp
which is secured by a 10mm bolt. Remove the bolt entirely. The canister
has two pipes at the back, and one at the front which can easily be
removed. Pull the semi-rigid pipe from the plastic clamps, and then pop
it out of the rubber device at the front of the canister:

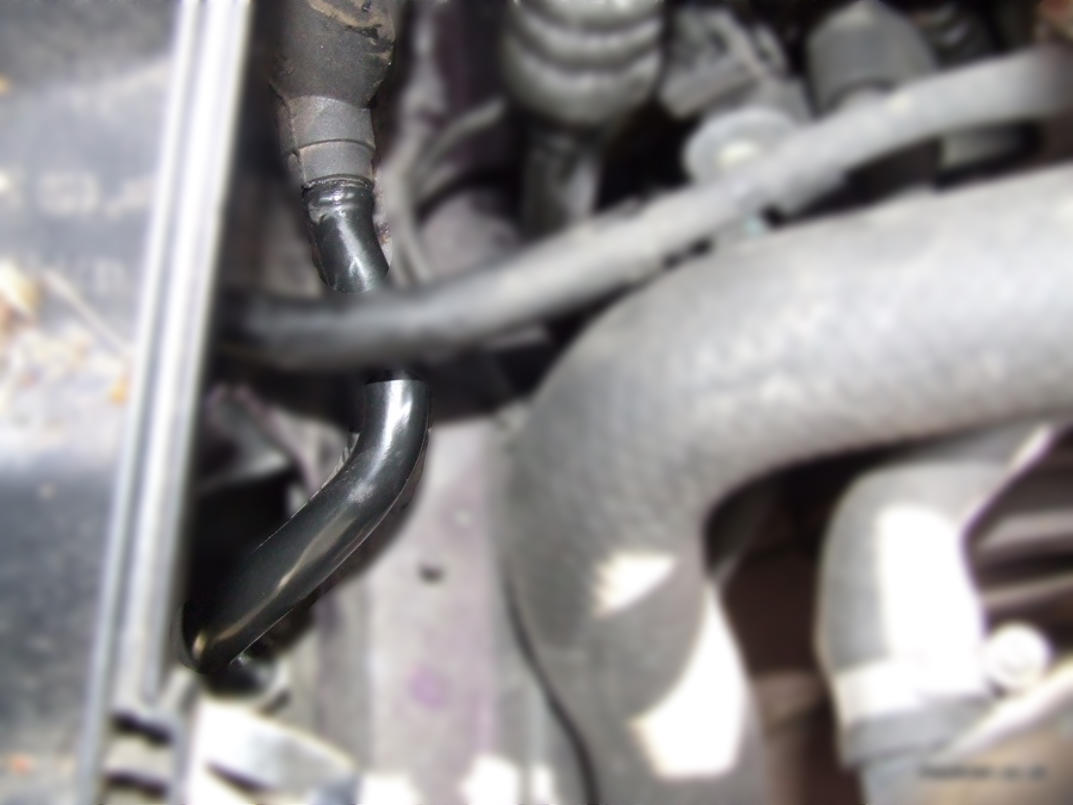
The clamp that holds the canister in place looks like this, it is in two
parts once the bolt is removed:
As you lift the canister upwards, the lower half of the clamp will come
loose, get ready to catch it (I, obviously, had to fetch it from the exhaust
manifold):
Push the canister backwards to clear the airbox, then lift the front of it
and tie it out of the way:
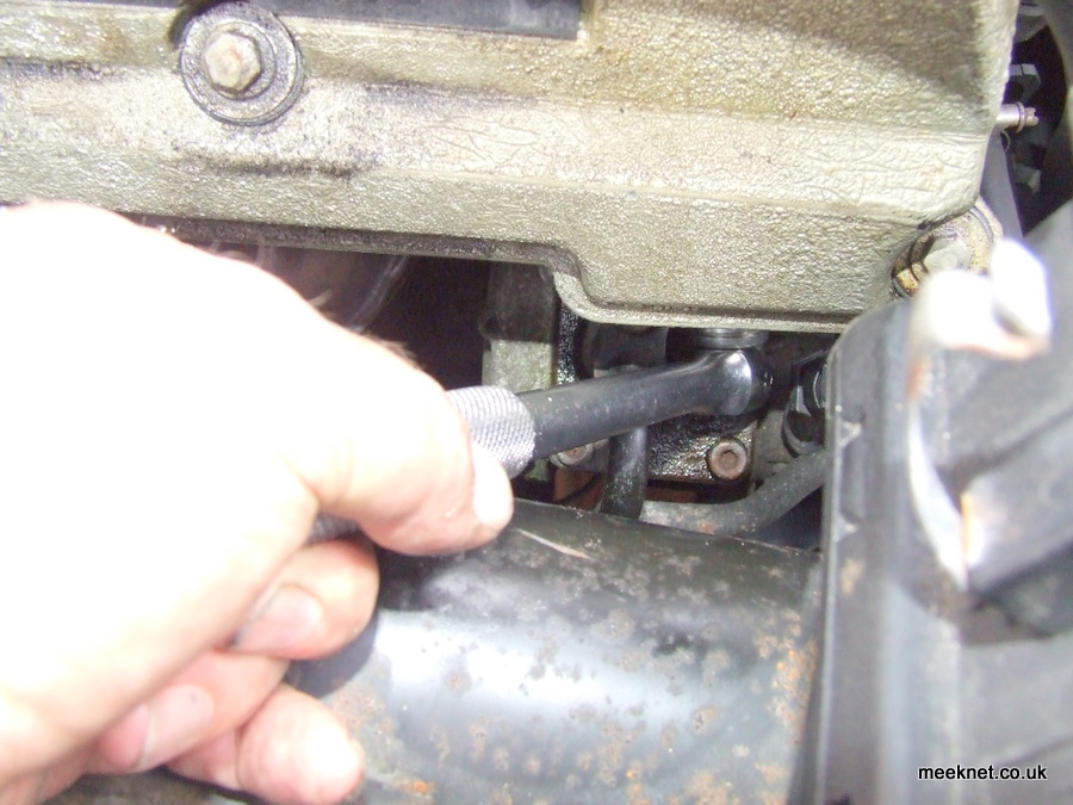
With those parts out of the way you can now get a 19mm socket onto the
tensioner cap. Now, if you had a deep 19mm socket this would be really
easy, instead, I've got a normal one and can manage about a 16th of a
turn each go due to the pipework from the A/C compressor getting in the
way. The following two pictures are from the first time I changed the
tensioner:

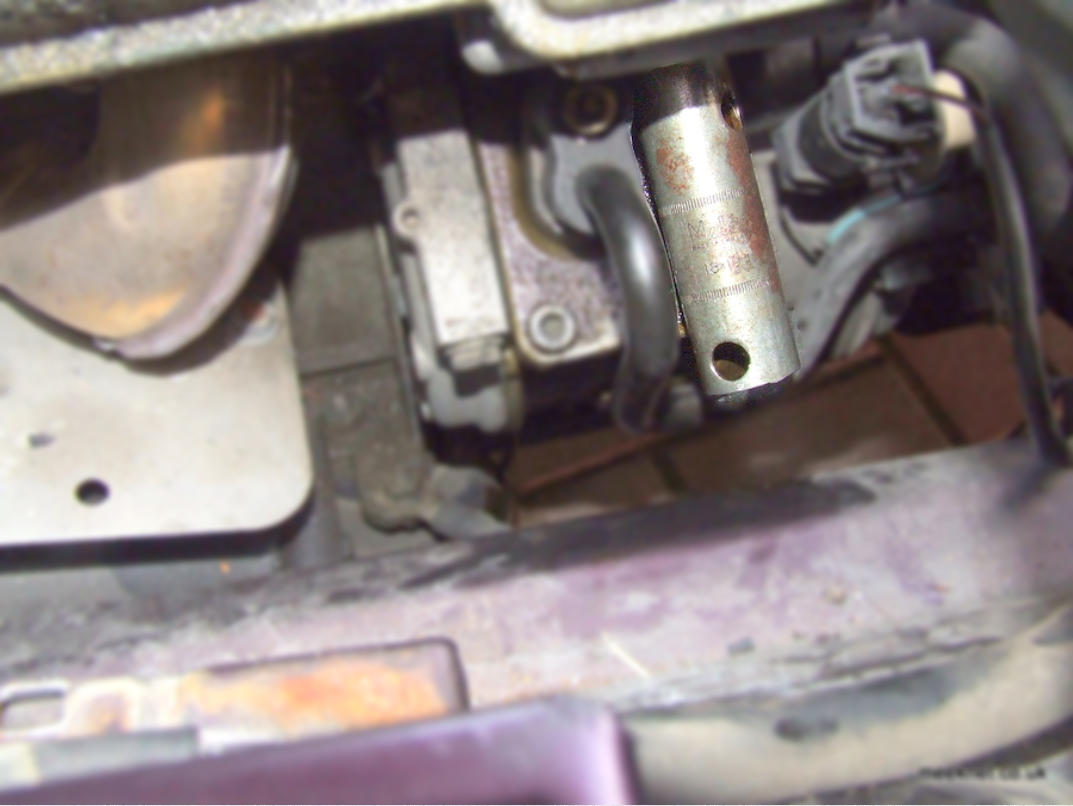
The second time, I had purchased a longer 19mm socket, but it was still
not long enough. In retrospect, this would be simple if a
universal-joint was used on the socket wrench (which I seem to have
lost). The tensioner cover points downwards at such an angle that a
standard socket wrench cannot be fitted on the long socket - the universal
joint would solve this problem. After scrabbling through half-a-dozen old
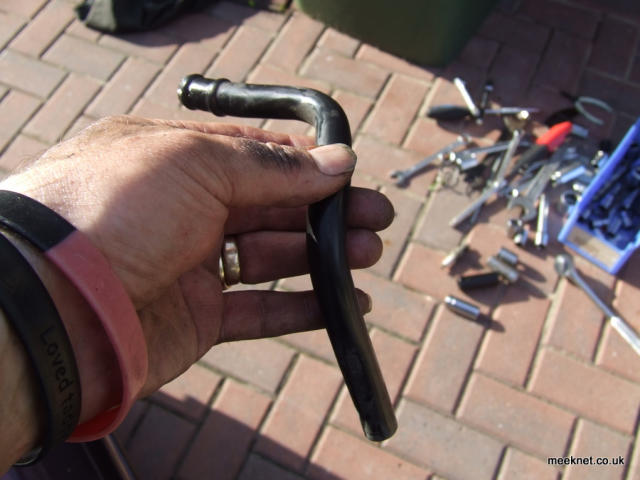
toolboxes I found a 19mm/17mm box spanner - chopped off the 17mm
end with a hacksaw and used a tommy-bar:

The box spanner and the tommy-bar worked quite well, and I was able to
get quite a bit of torque on it when fitting the new tensioner. There will be
a few drops of oil come out as the tensioner is removed, it makes the
socket pretty slippery, but once the cover is cracked with the socket it will
spin out quite easily. The tensioner itself will slide out with the cover, place
it somewhere where the oil that leaks out if it
does not cause any damage.
With the tensioner removed, ensure that the crush-washer came out as
well (No 21 in the diagram). Clean the face of the timing cover with a
cloth to ensure a good mating surface. Fit the new crush-washer to the
new tensioner cover, fit the tensioner to the cover and slide it into
position. Tighten by hand as much as possible and then use the wrench to
give it a good 20NM torque (about a grunt and a slight heave) and the
new one's in
When re-fitting the canister, place the lower-half of the clamp in place
and drop the canister over it to hold it in place while you fit the top half:

Grease the end of the semi-flexible pipe so it is easy to pop it back in the
canister:
Get the pipe near the plastic pipe-clamps and then poke it back in the
canister, then push the pipe into the two plastic pipe-clamps:

When the engine is first started it will make some scary noises, but as
soon as the oil gets in the cylinder it will soon sound lovely.
Time for a cup of tea!
Tools and parts used in this article


SEARCH MEEKNET
SEARCH MEEKNET