Timm's BMW E31, E32 and E38 Auxiliary Pump Repairs
The auxiliary pump on both the E31, E32 and E38 seem to cause all sorts of problems! The most common fault is that they leak from the
centre-join. They can also restrict the coolant-flow to the heater so that heat is only felt from the heater when the engine is at high RPM.
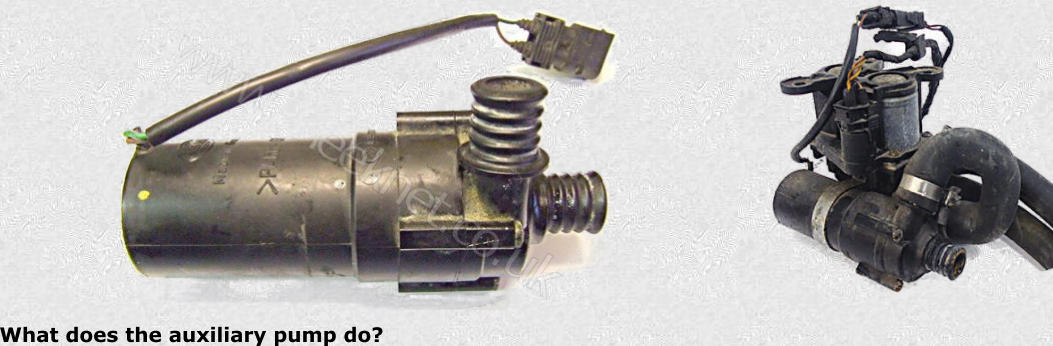
The auxiliary pump's primary role is to provide coolant flow through the cabin heater matrix when the engine is not running or the RPM is
low. The pump will run as long as the coolant temperature is above 30C and the heater controls are set to demand heat. It can also be
forced to run by turning the drivers temperature control fully right past the detent - it will then run at any coolant temperature.
With the ignition in position I and II, when the 'REST' button is pressed (as long as the above conditions are met), the auxiliary pump will
circulate coolant through the engine block and through the heater matrix. This allows the cabin heater to operate without the engine
running. The pump also runs when the engine is running as long as the above conditions are met. The pump ensures good coolant flow
through the matrix. It is not designed to cool the engine, but it will help as a by-product of its primary function.
Do you need the pump to work? Is a good question, I have found that if you have a pump and it doesn’t work it will reduce coolant
flow through the heater matrix - but, if you remove it completely the heater system works perfectly except for the lack of the REST
function - and the E31 doesn’t have this function. I’ve done without one for five years now.
Common faults
The usual failure is leaking from the centre joint where the pump is bolted to the motor, a sure sign of this is white coolant marks on the
joint. The pump-motor can seize and this may reduce the coolant flow to the heater. In this situation the cabin heater will be very
inefficient, in very cold weather the heater will fail to supply a great deal of warmth with the engine at idle.
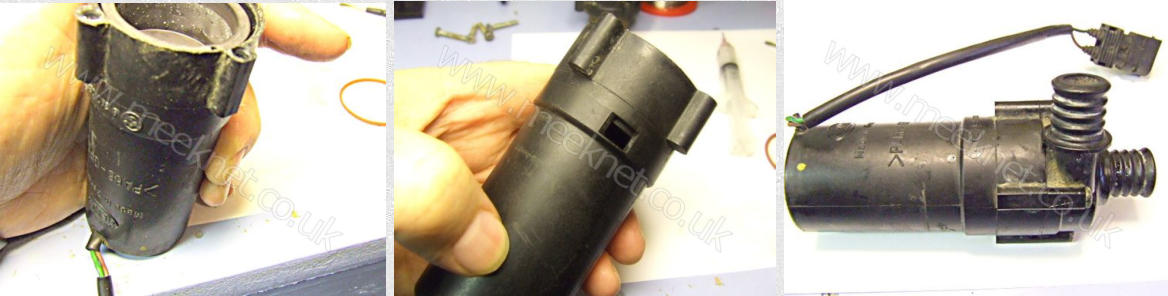
Dismantling the pump
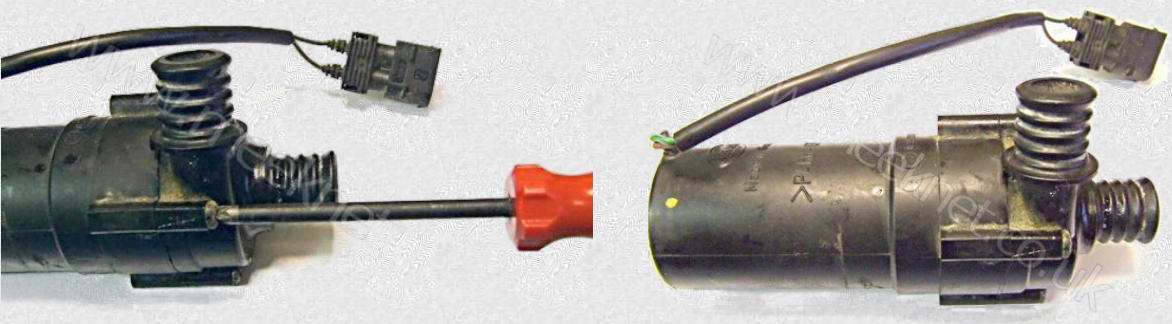
Remove the four self-tapping screws and pull the pump away from the motor
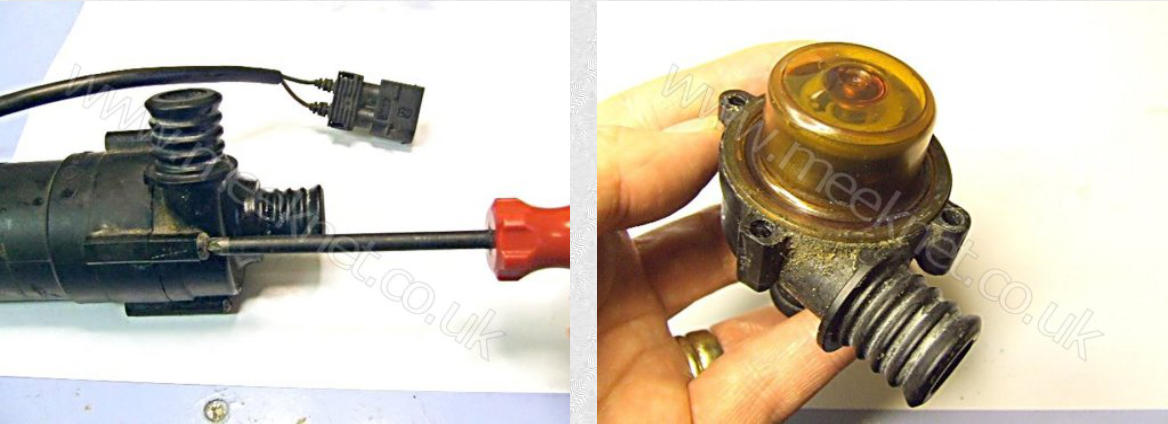
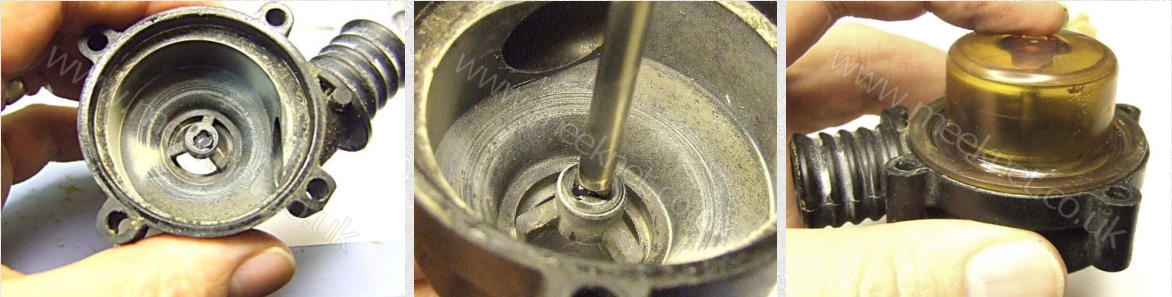
Carefully work the amber cover away from the pump body. Lift the impeller from the pump body. Note that there is a thin washer that will
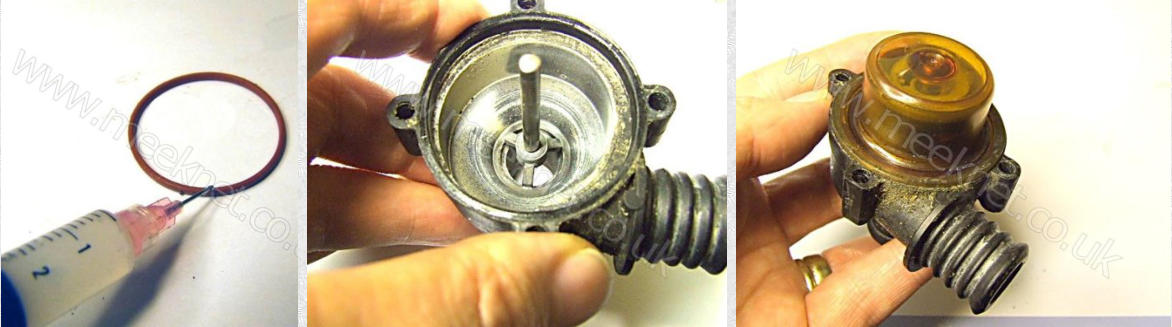
either stay with the impeller or will be left on the shaft. Remove and inspect the o-ring
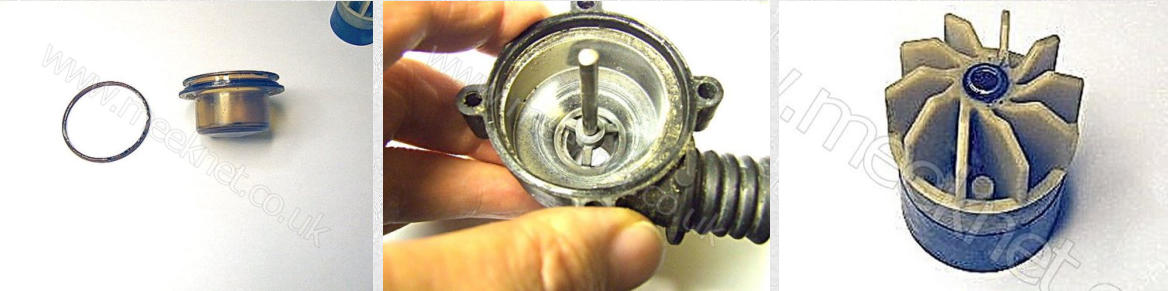
As can be seen from the dismantled auxiliary pump, there is no seal between the pump-body and the motor. Instead, the amber cover has an
o-ring that seals on the inside surface of the pump body. Unless the pump body or the amber cover is cracked, any leak will be due to the
failure of this o-ring.
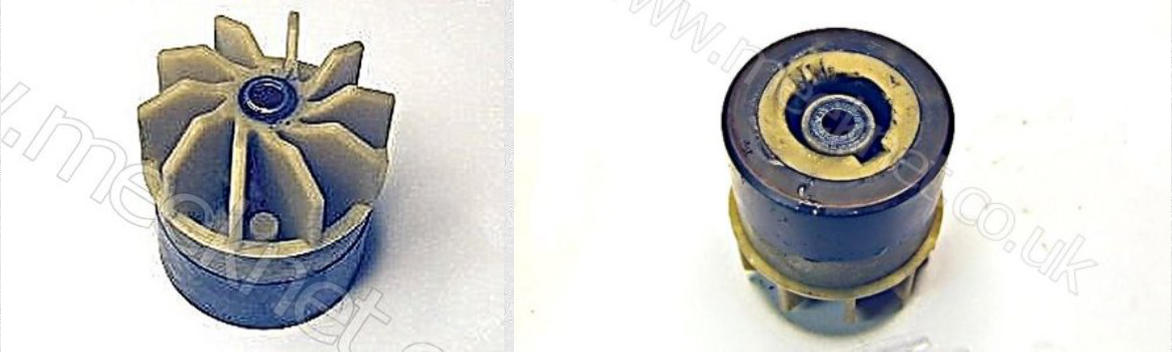
The drive between the motor and the impeller is magnetic, the motor has a large circular magnet that couple with the smaller magnet that is
part of of the impeller. The motor has a drain-hole on the underside, it is important that when reassembled the drain hole is at the bottom!
When the auxiliary pump is assembled the wire should exit level with the top pipe of the pump body and the drain-hole facing away from it
Refurbishing the auxiliary pump
Impeller centre shaft
The impeller shaft in this example is loose in the pump body, when the amber cover is fitted there is little contact between the shaft and the
recess in the cover. This leads to movement of the shaft when the pump is in operation and this causes the impeller to rub on the housing. To
solve this problem I have used Araldite epoxy resin to lift the shaft slightly so that there is more contact within the cover. Do not use Araldite
Rapid, this is not waterproof over long periods of time.
Here, the Araldite is carefully dropped into the shaft cavity, the shaft is fitted and the amber cover put in position without the o-ring fitted.
I removed the cover again and cleared the surplus Araldite that was pushed from the shaft cavity. I then refitted the cover and left the
assembly placed with the cover downwards until the Araldite had set
Impeller problems
Another common fault is that the impeller plastic body separates from the outer magnet. In this case the magnet usually moves away
from the impeller body and jams. Araldite can be used to reassemble the two parts successfully
Once all the Araldite has set the pump can be reassembled. If the o-ring still has a round section it can be reused, if it has been flattened
then it will need to be replaced (40mm x 2mm). Grease the o-ring and the inner section of the amber cover, also grease the inner surface of
the pump body. Use LM grease to lubricate the shaft and refit the impeller, ensuring that the washer is placed between impeller and body.
Refit the amber cover using a turning action to spread the silicone grease evenly
Refit the motor to the pump ensuring they are aligned as shown. The pump should demand 0.7A @ 12V when running dry. There may be
some noise and vibration but this is normal when running dry
All done, time for a cup of tea!